SocialCensor
Nicht alles ist offensichtlich.
Hier findest Du nach und nach alle Funktionen von SocialCensor.
Und wenn Du dann immer noch nicht weiter kommst, melde Dich gerne bei mir. Deine Fragen helfen mir, diese Seite zu vervollständigen.
Diese Anleitung gilt für SocialCensor auf Mac, iPad und iPhone. Die Bedienoberfläche kann je nach Gerät etwas anders aussehen, die beschriebenen Funktionen und Arbeitsschritte sind bis zur Version 1.5 jedoch weitgehend identisch.
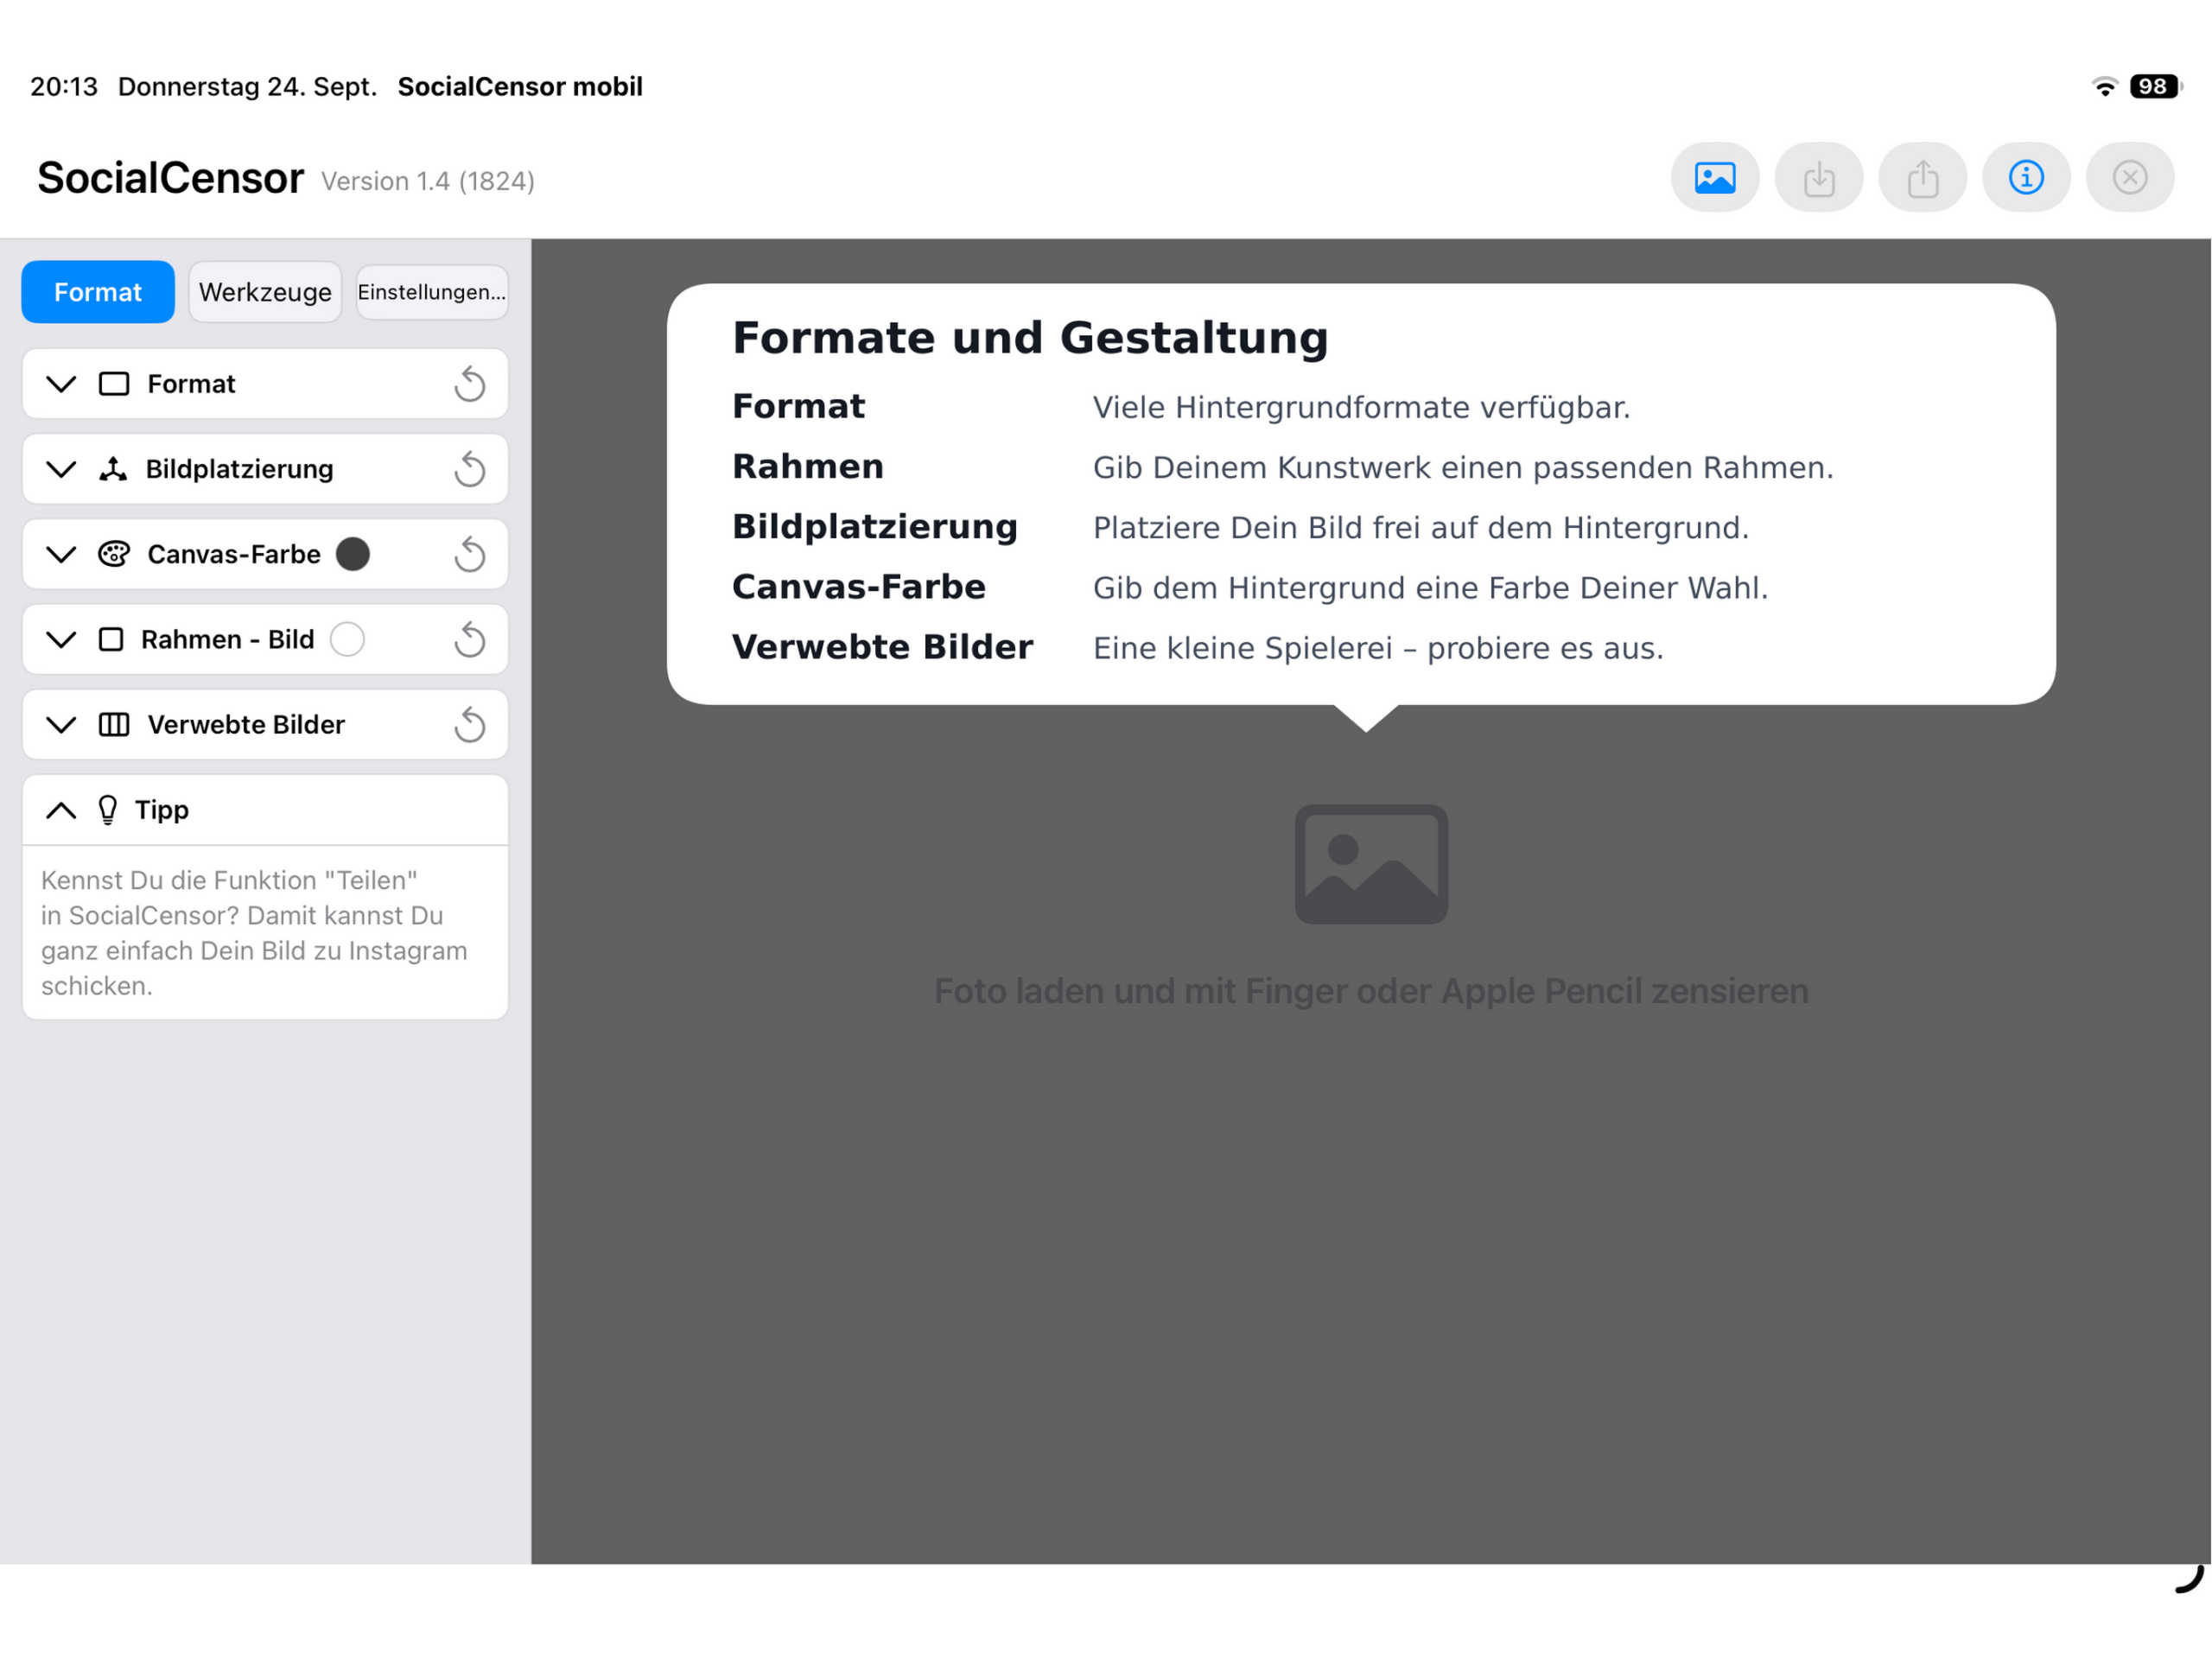
Der Aufbau der App ist in allen Versionen fast identisch. Links (oder auch unten in iOS) ist der Arbeitsbereich, rechts der Bildbereich.
Mit Bild öffnen (Icon ganz oben links) kannst Du ein Bild aus Deinem Dateisystem (macOS) oder aus der Mediathek (iOS und macOS) öffnen. Möglich ist es auch, ein Bild direkt in den Bildbereich zu ziehen.
In der Kachel Formate kannst Du aus verschiedenen Formaten einen Hintergrund wählen.
In der Kachel Rahmen kannst Du Dein Bild oder den Hintergrund einrahmen.
Bildplatzierung ermöglicht es Dir, die Bilder frei auf den Hintergründen auszurichten.
Canvas-Farbe meint, dass Du jedem Hintergrund eine eigene Farbe geben kannst, natürlich auch schwarz, weiß und alles was dazwischen liegt.
Verwebte Bilder ist eine kleine Spielerei, die ich interessant für die Umsetzung fand. Du zerschneidest mehrere Bilder und setzt sie „irgendwie“ wieder zusammen. Deiner Kreativität sind keine Grenzen gesetzt.
Ab Version 1.5 kannst du auch ein fertiges Projekt absichern und später weiter bearbeiten. Auch auf einem anderen Gerät.
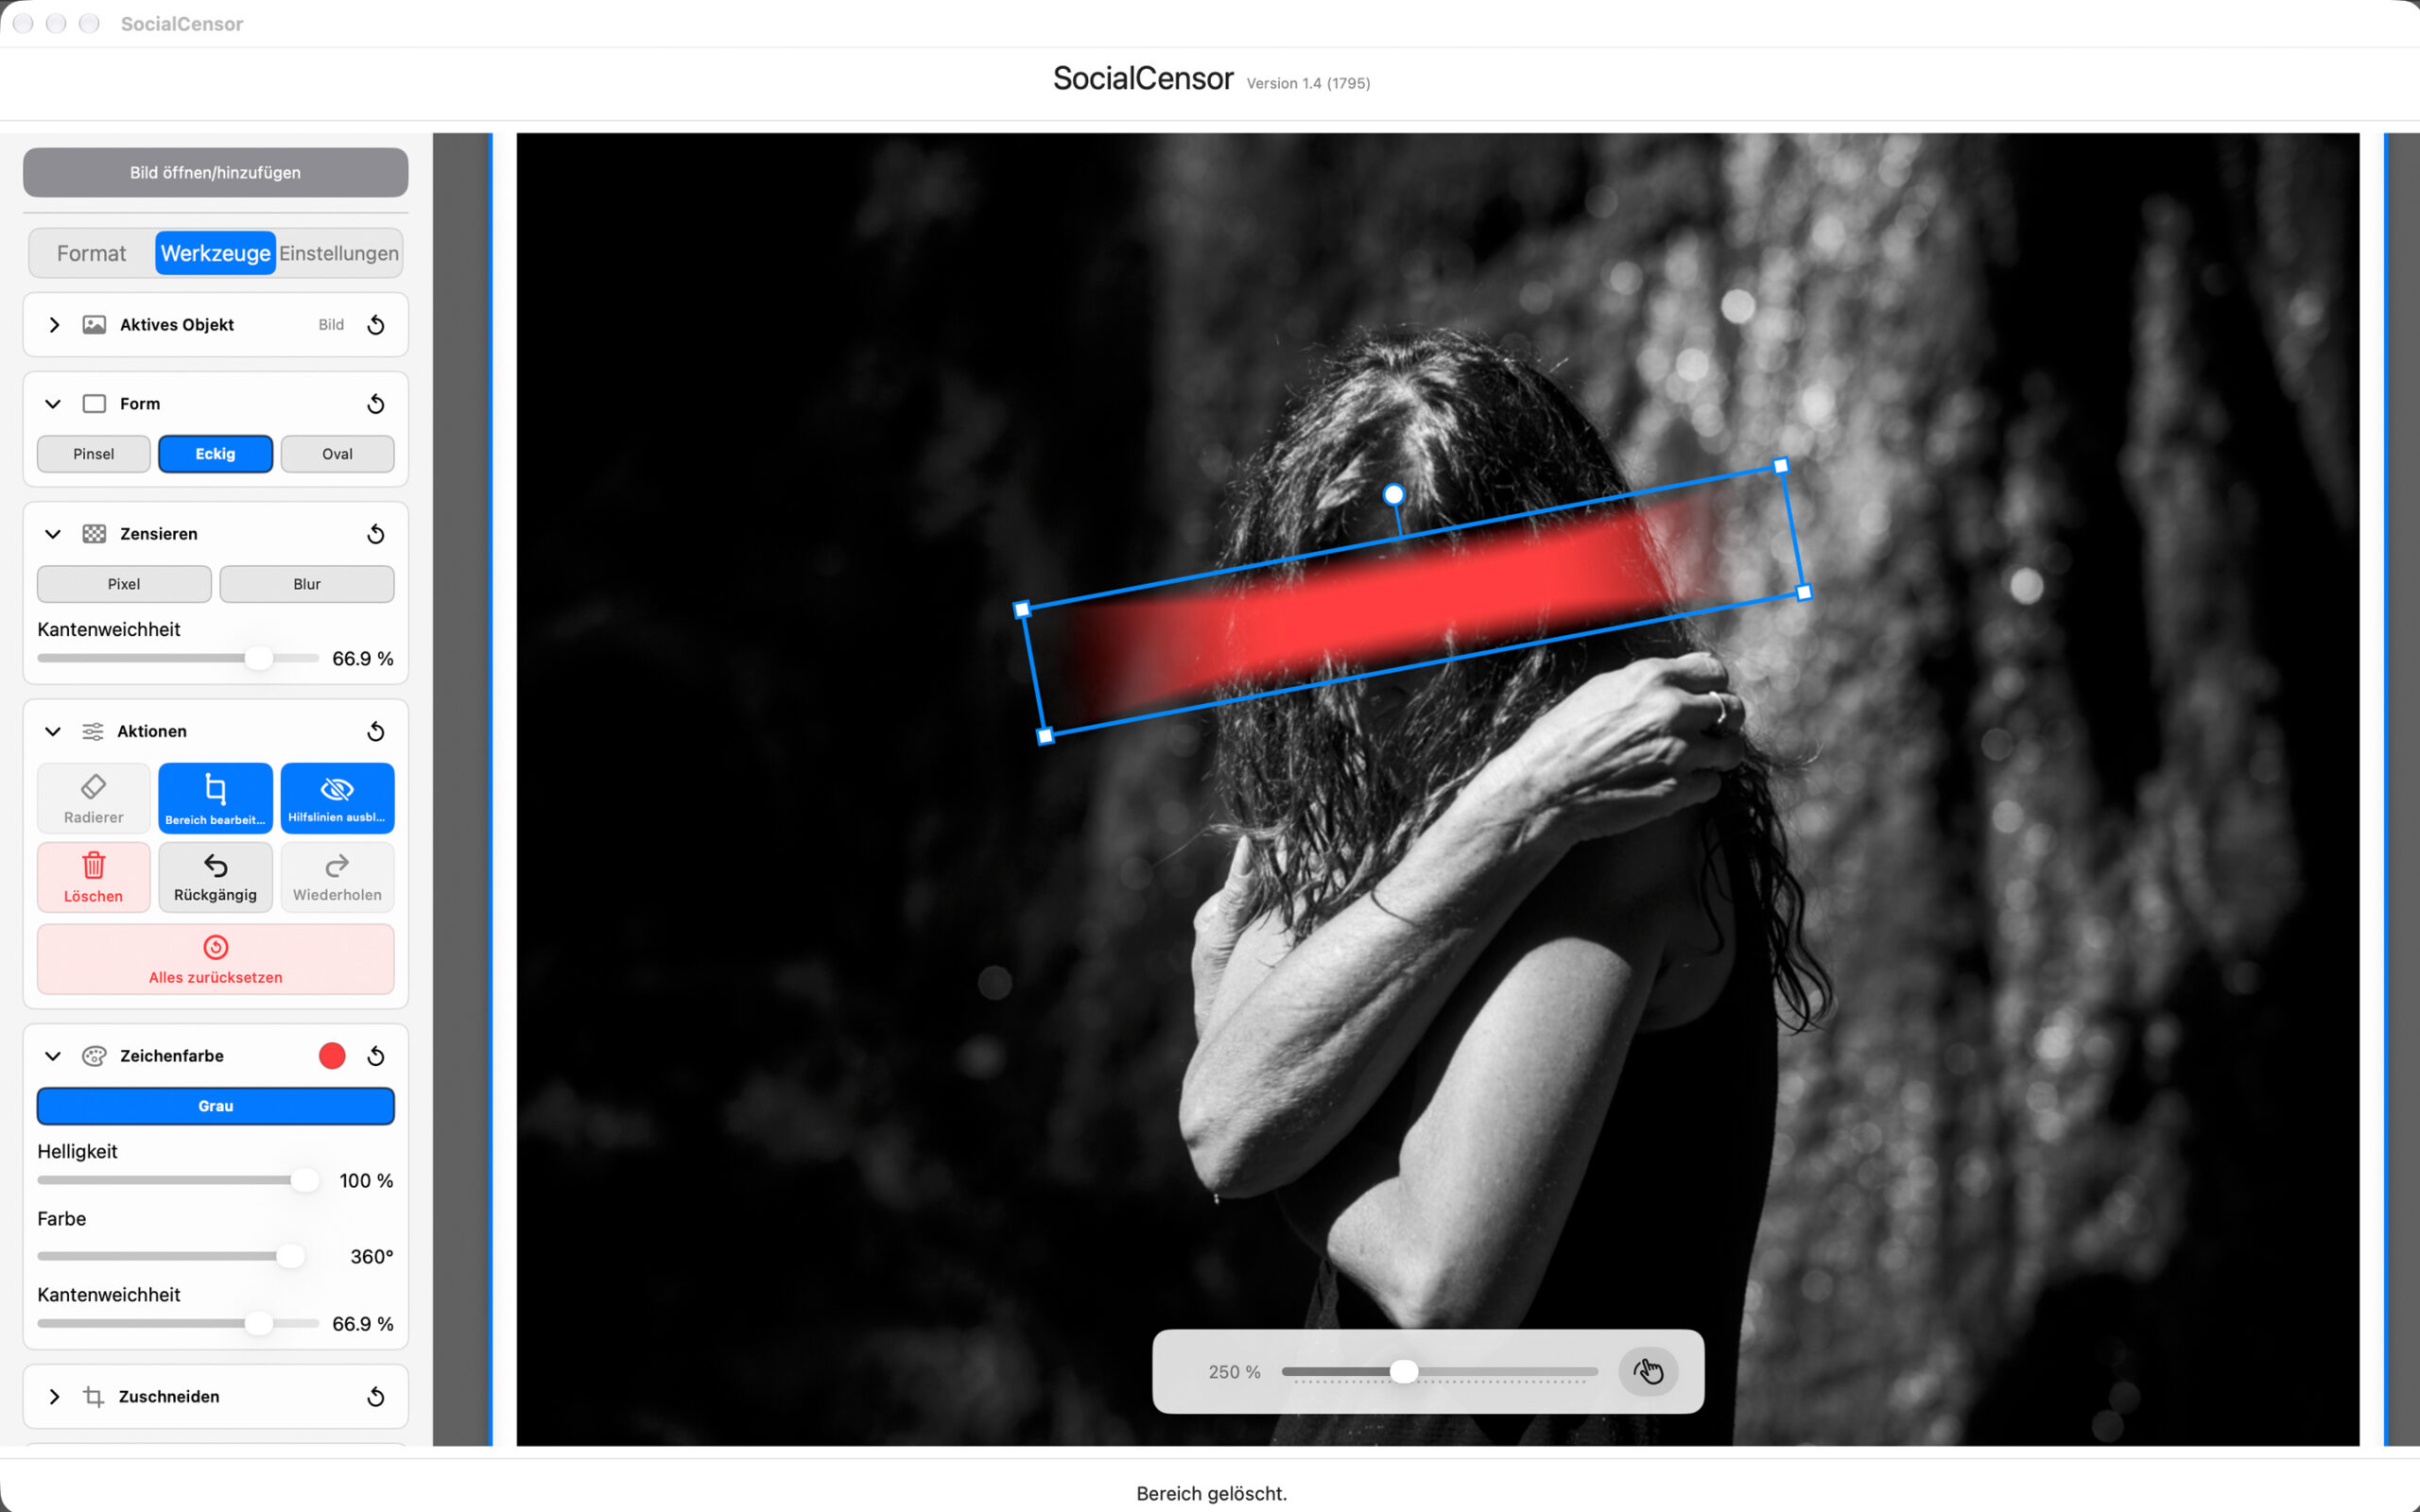
In diesem Beispiel siehst Du das geöffnete Bild in der macOS-Version. Ein sensibler Bereich ist farbig überdeckt und mit einer blauen Markierung versehen. Das heißt, Du kannst den Bereich verschieben oder drehen oder verkleinern, wie Du möchtest.
Über den Schieberegler kannst Du das Bild für ganz feine Vereitelungen bis zu 500 % vergrößern.
Die Größe der Verpixelung oder die Stärke der Weichzeichnung kannst Du ebenso verändern wie eine farbige oder schwarz-weiße Zentrierung.
Wenn Dir das Ergebnis nicht gefällt, kannst Du natürlich alle Änderungen zurücksetzen.
Neben der Verpixelung kannst Du den markierten Bereich weichzeichnen oder auch farbig absetzen.
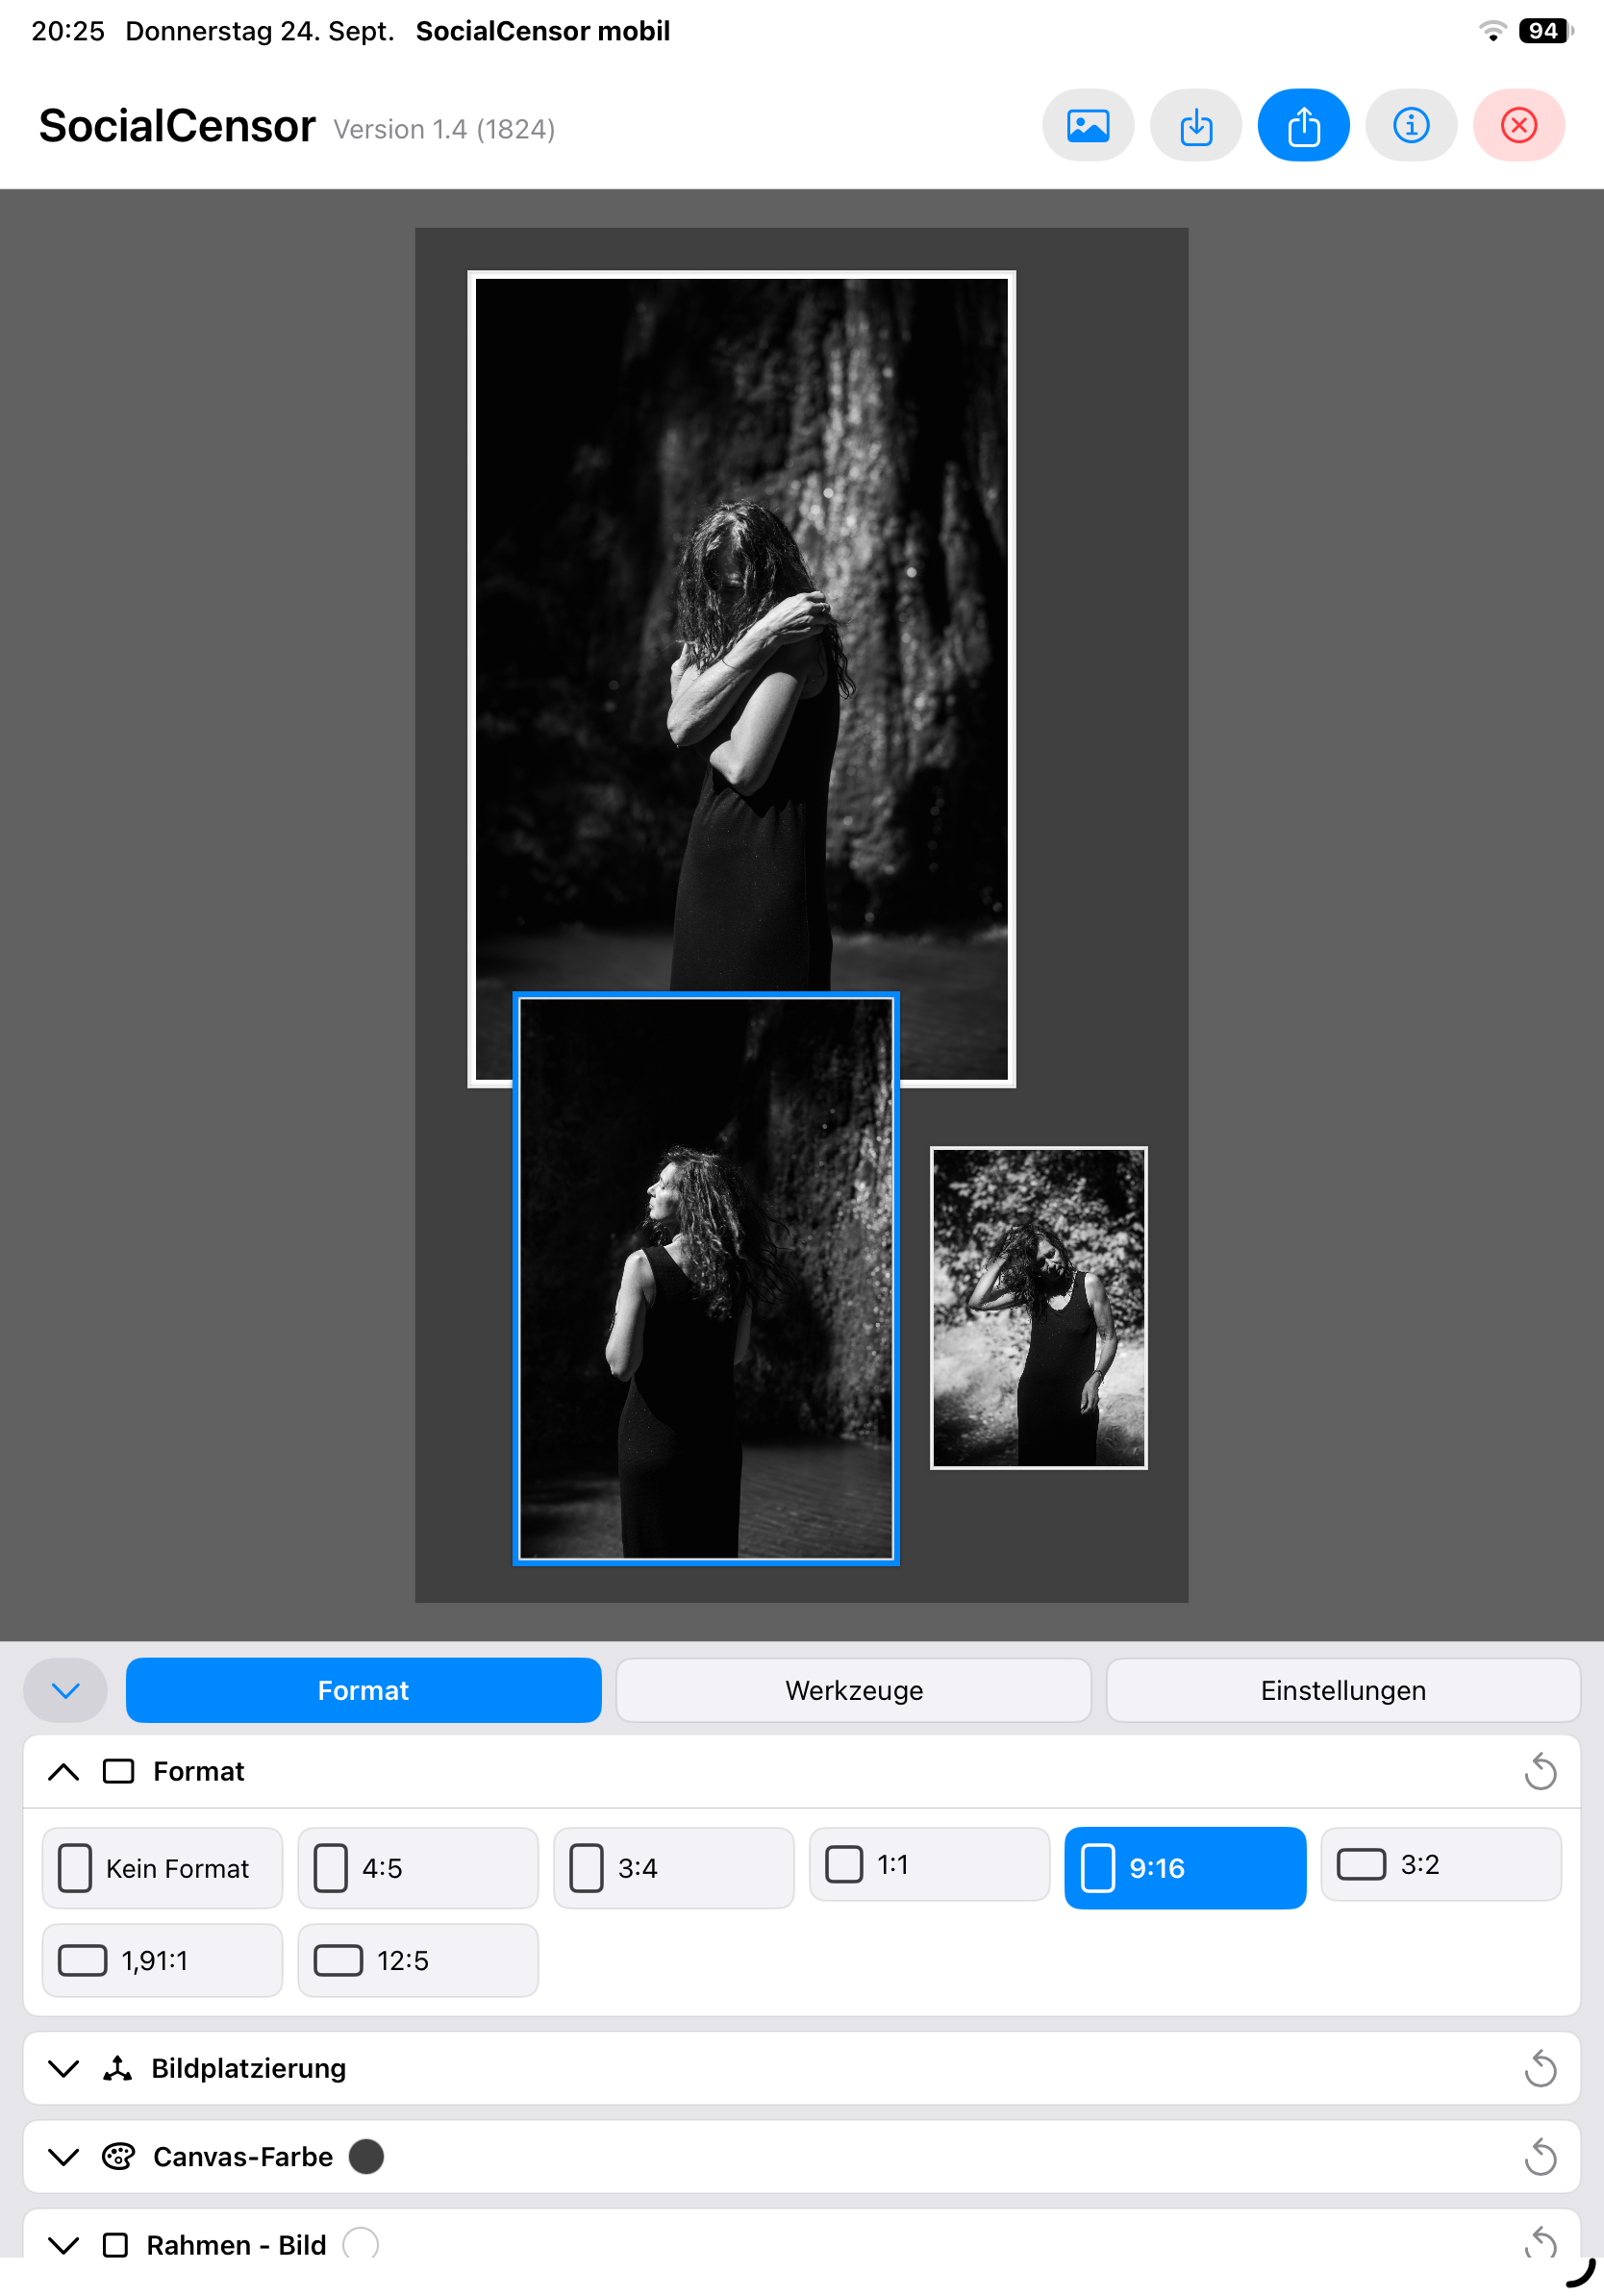
Hier habe ich auf dem iPhone mehrere Fotos für die Instagram-Strory zusammengestellt.
Die Fotos können auf dem Hintergrund frei angeordnet werden, Du kannst Sie zudem noch spiegeln, drehen und mit einem Rahmen versehen.
Gefällt Dir Deine Arbeit, kannst Du jederzeit den Hintergrund wechseln und Deine Bilder neu anordnen.
Wusstest Du, dass die iOS-App auch auf Deinem MacBook läuft, wenn er einen Apple-Silicon-Prozessor, also M1, M2, M3, M4 usw. hat.
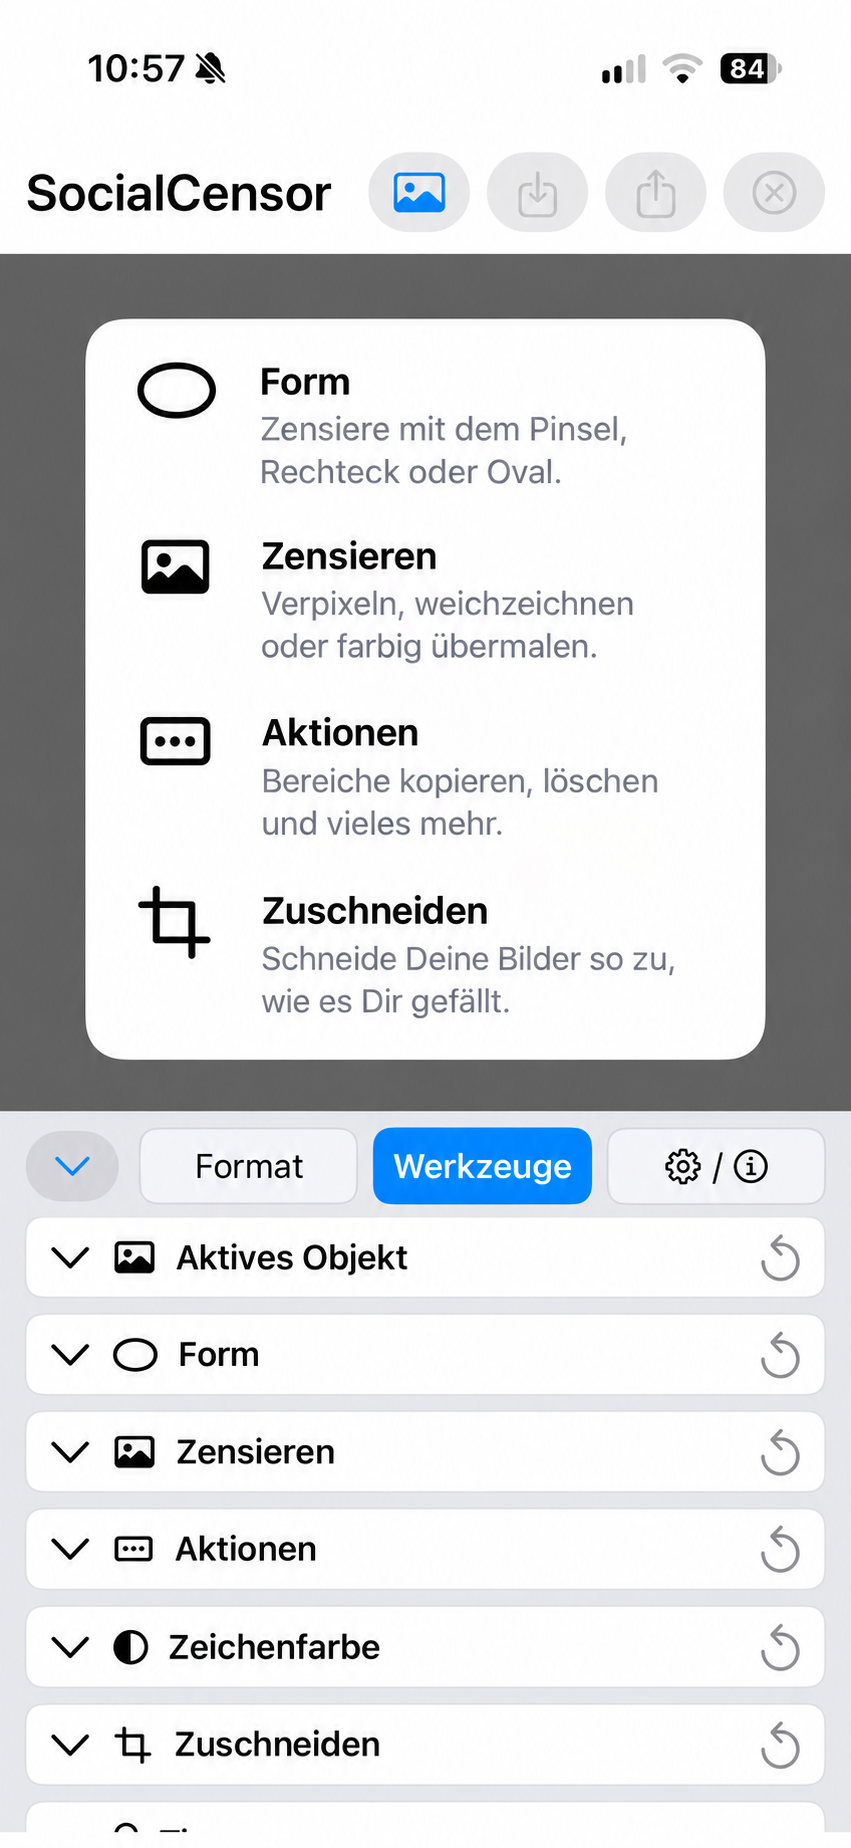
Wir sind im Panel Zensur.
Du kannst zwischen einem Pinsel, einem Rechteck oder einem Oval wählen.
Für die Zensur kannst Du verpixeln, weichzeichnen oder farbig übermalen auswählen.
Auf der Kachel Aktionen findest Du viele Werkzeuge, die Dir beim zensieren helfen.
Natürlich kannst Du Dein Bild zuschneiden und den gewählten Ausschnitt weiter in SocialCensor nutzen.
Sämtliche Bearbeitung der Bilder findet nur auf einer Kopie statt. Dein Originalbild bleibt unverändert erhalten.
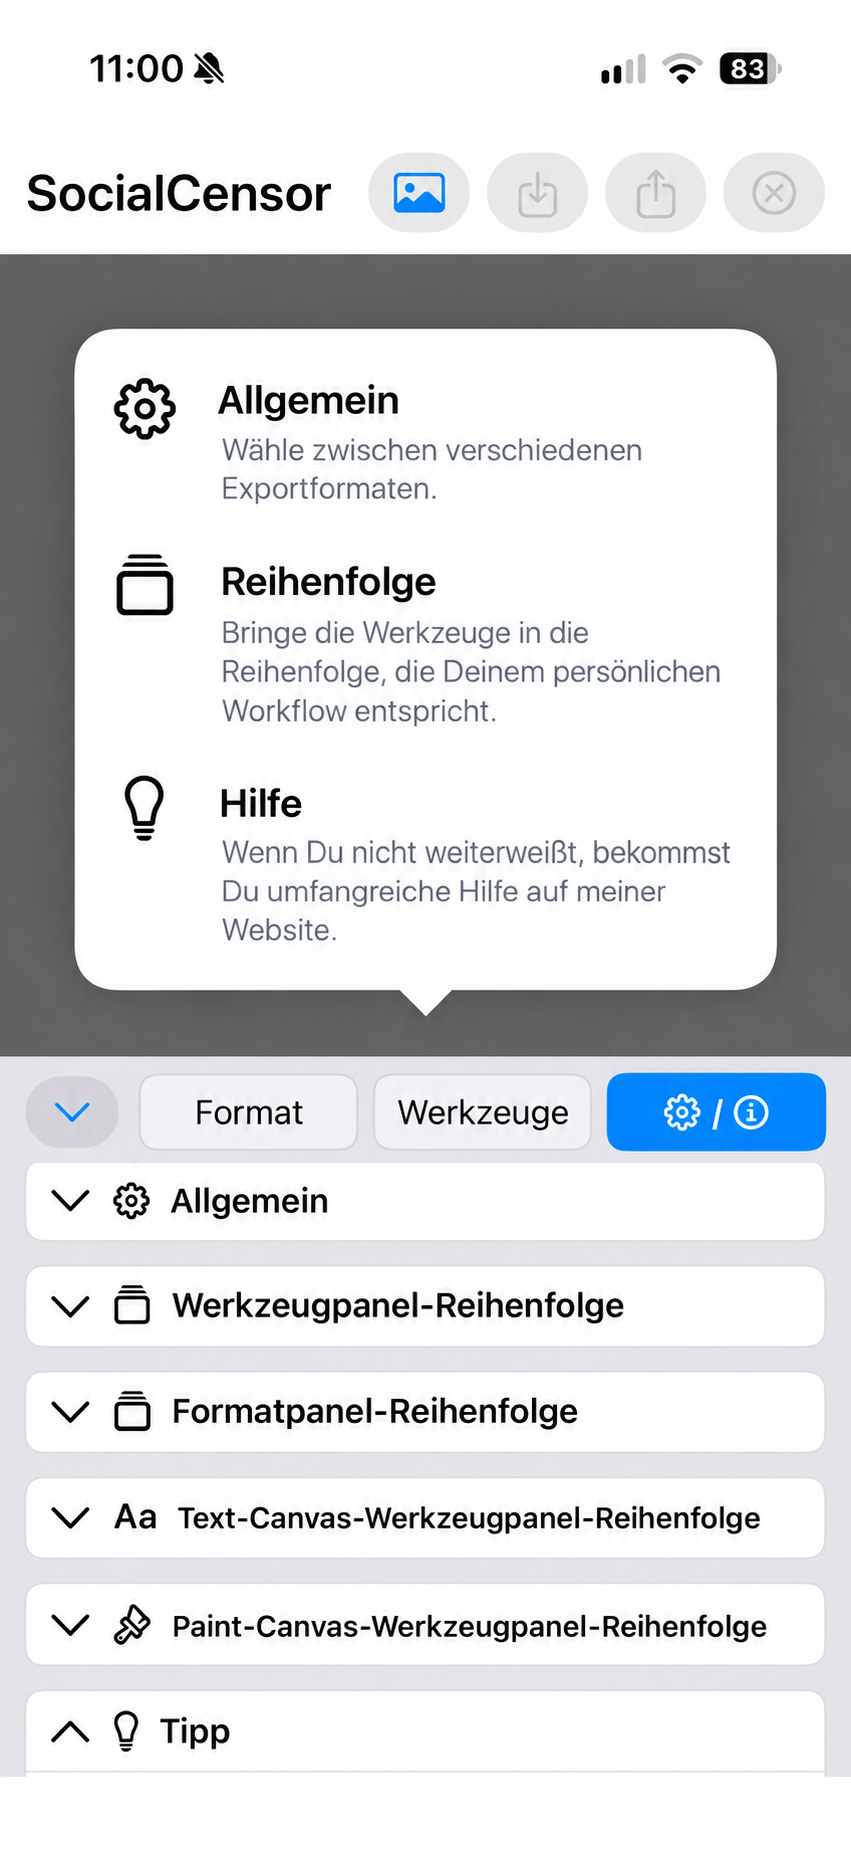
Im Bereich Einstellungen / Info kannst Du auf der Kachel „Allgemein“ festlegen, ob die Werkzeuge so gespeichert werden sollen, wie Du sie das letzte mal benutzt hast und Du kannst den Hintergrund des Bildbereiches von weiß bis schwarz in verschiedenen Stufen ändern.
Die Reihenfolge aller Kacheln kannst Du Deinen Bedürfnissen anpassen, so dass Dein Workflow effizient abläuft.
Du kannst zwischen drei Exportversionen wählen:
Premium – in der vollen Auflösung der importierten Fotos.
Automatic – eine maximale Kantenlänge von 2.125 Pixeln wird bevorzugt.
Instagram – lass Deine Kunst in den von Instagram geforderten Größen exportieren.
Ganz oben rechts der rote Button löscht alle Deine vorgenommenen Änderungen. Unwiderruflich. Also bitte vorher speichern.
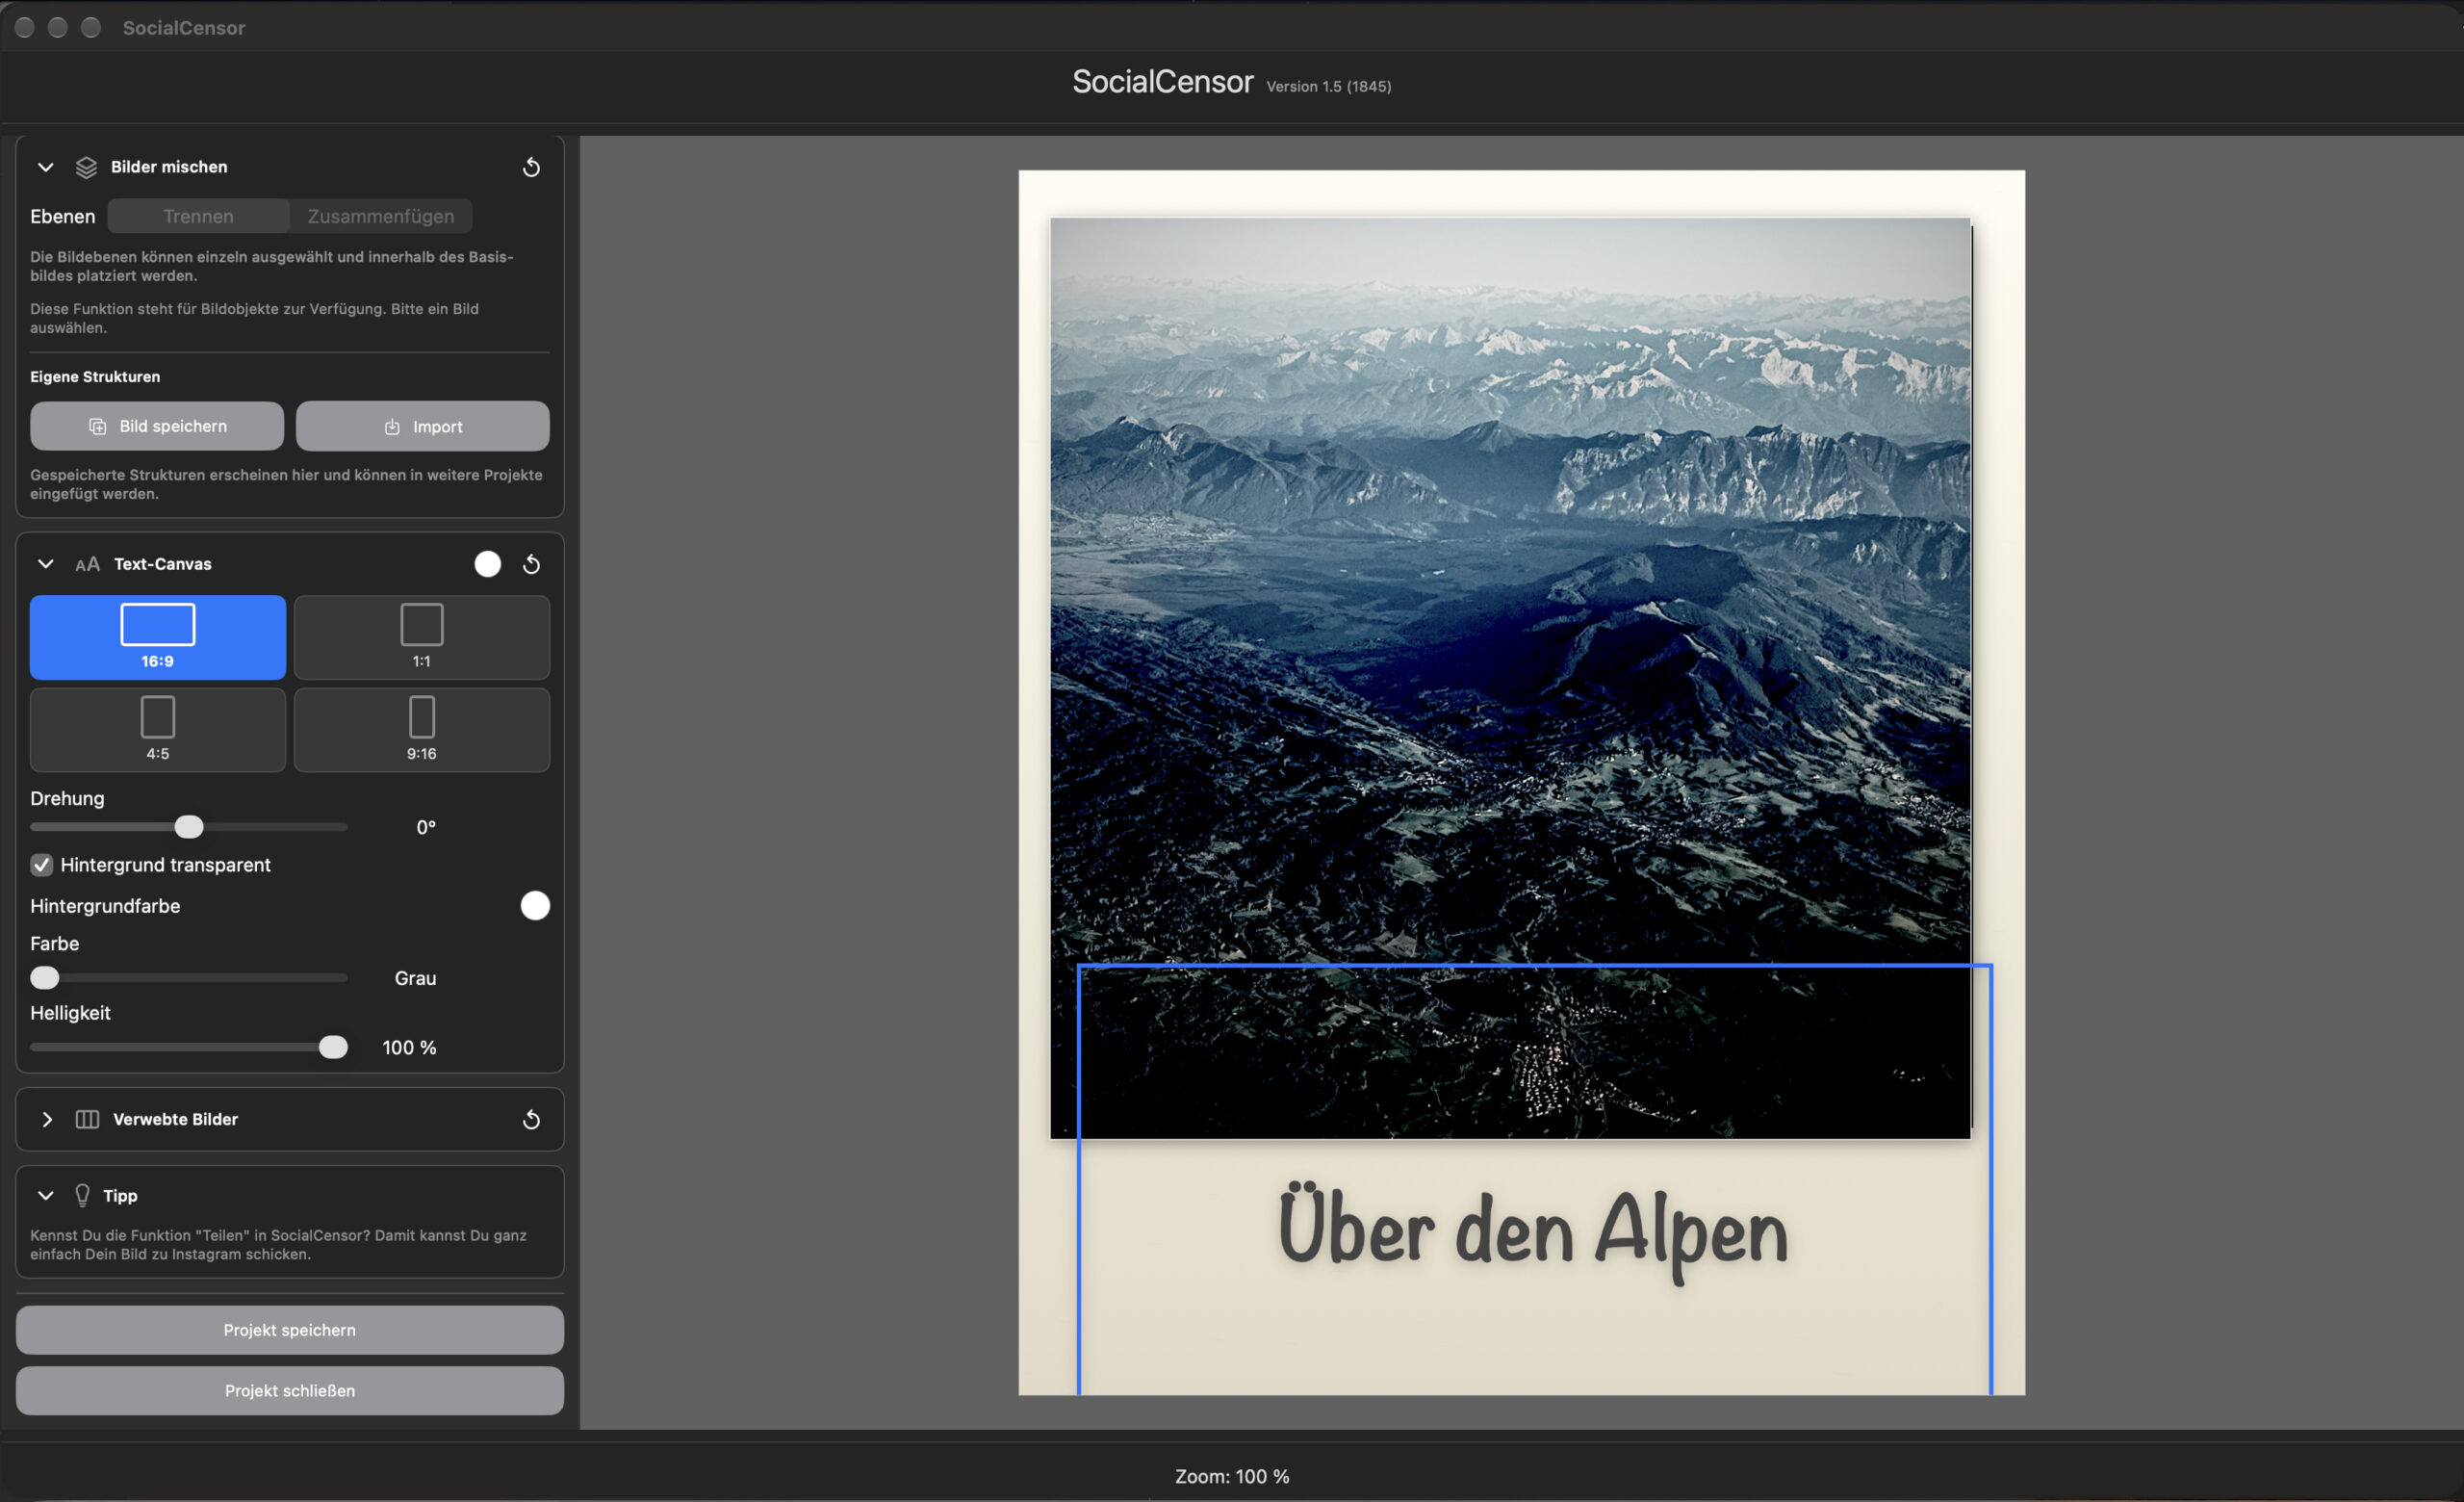
Zurück zu alten Zeiten. Mach aus Deinen iPhone-Fotos ein Sofortbild.
Hier habe ich ein Text-Canvas mit einem transparenten Hintergrund hinzugefügt.
Das Foto hat einen Filmlook erhalten, damit es älter wirkt.
Diese Funktion ist ab der Version 1.5 in der App enthalten und befindet sich derzeit noch in internen Tests.
WEITERes ENTDECKEN
Weitere Formate und mehr Ideen ab Version 1.4
1:1 – Quadrat
Canvas Quadrat
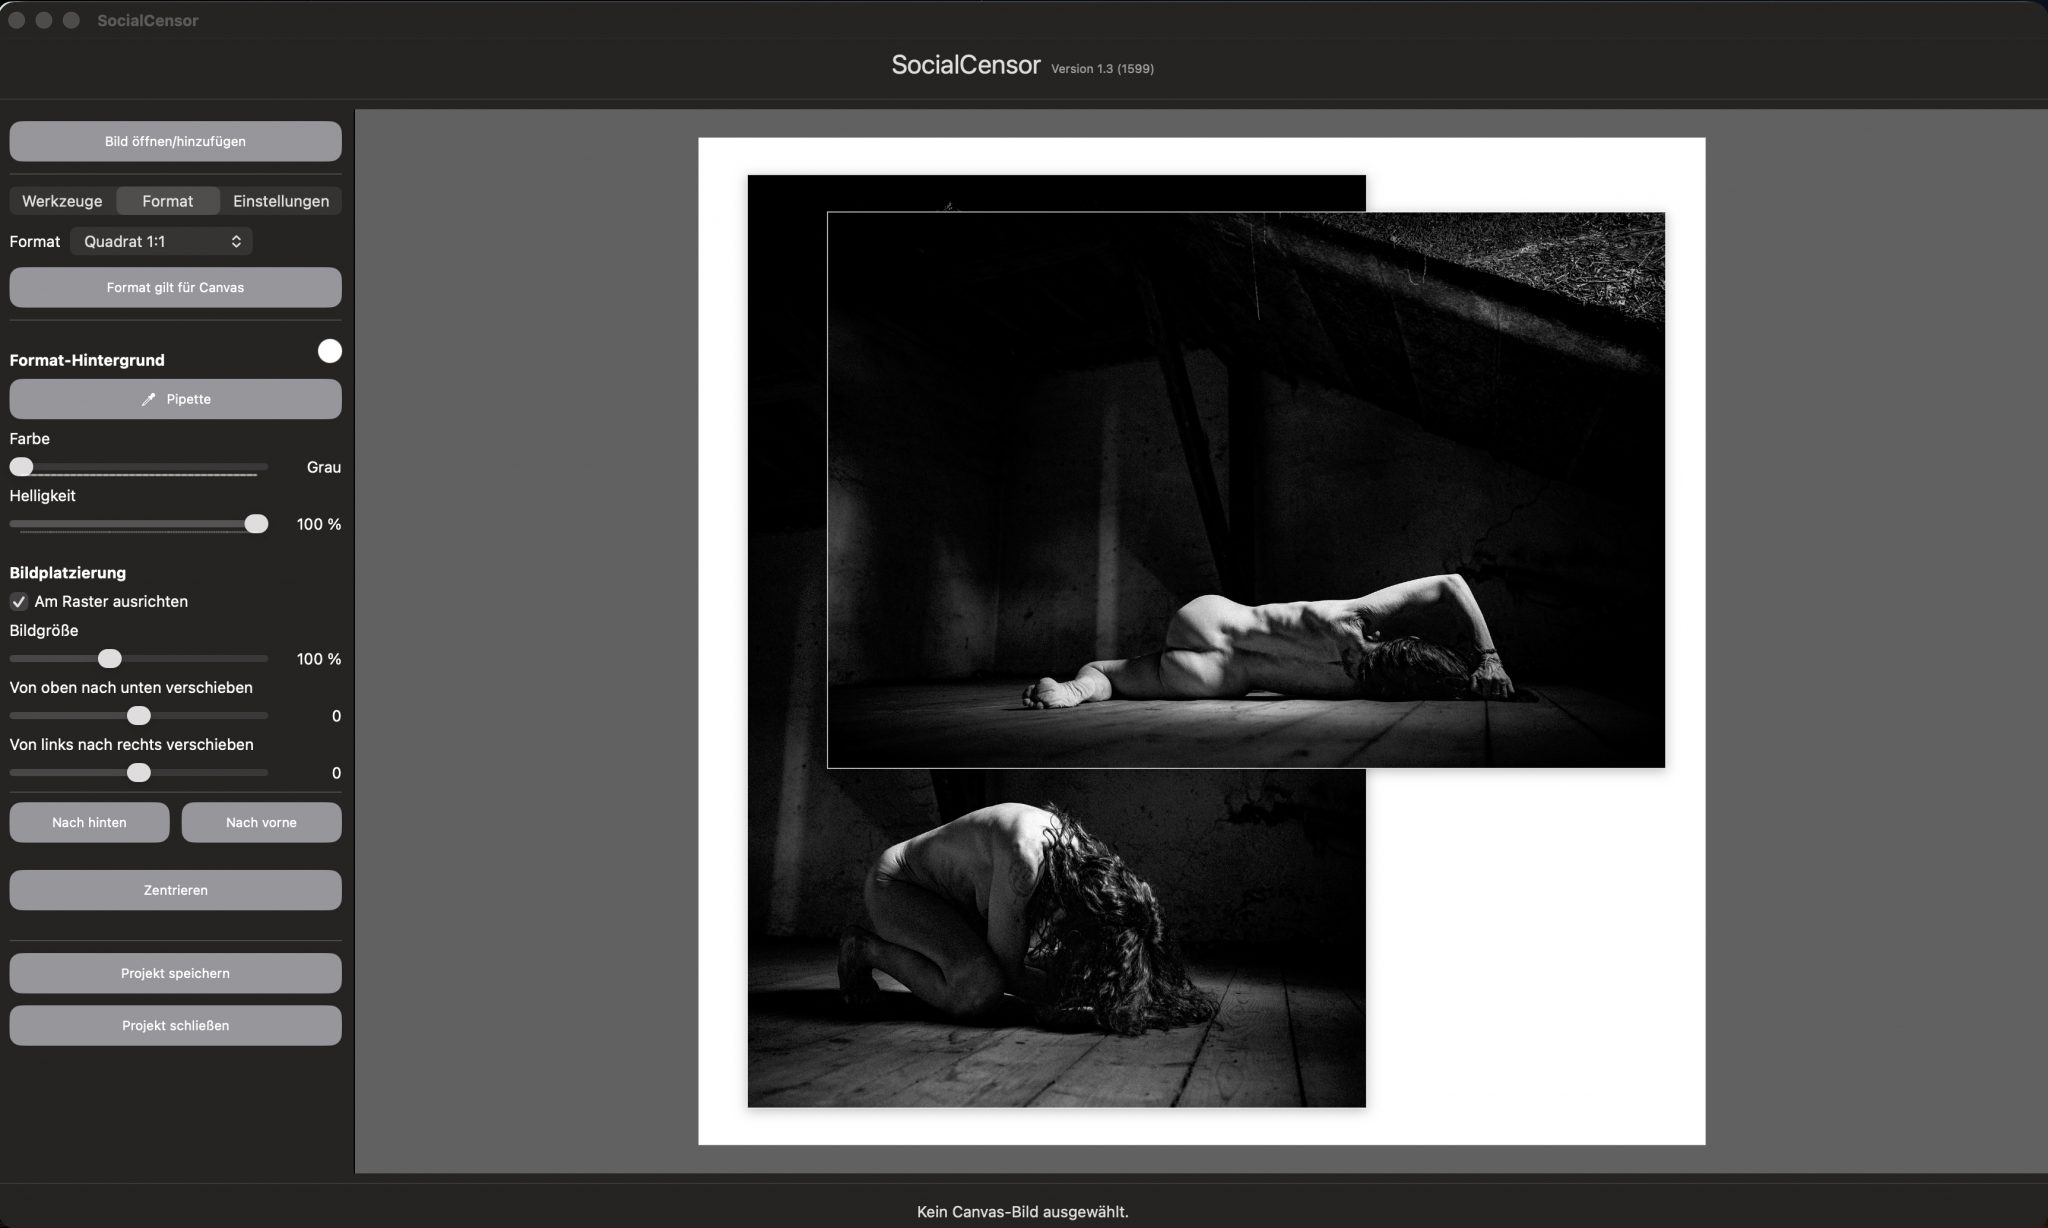
Die Bilder kannst Du auf jedem Hintergrund frei bewegen. Auch übereinander
3 * 4:5 – Triptychon
Triptychon
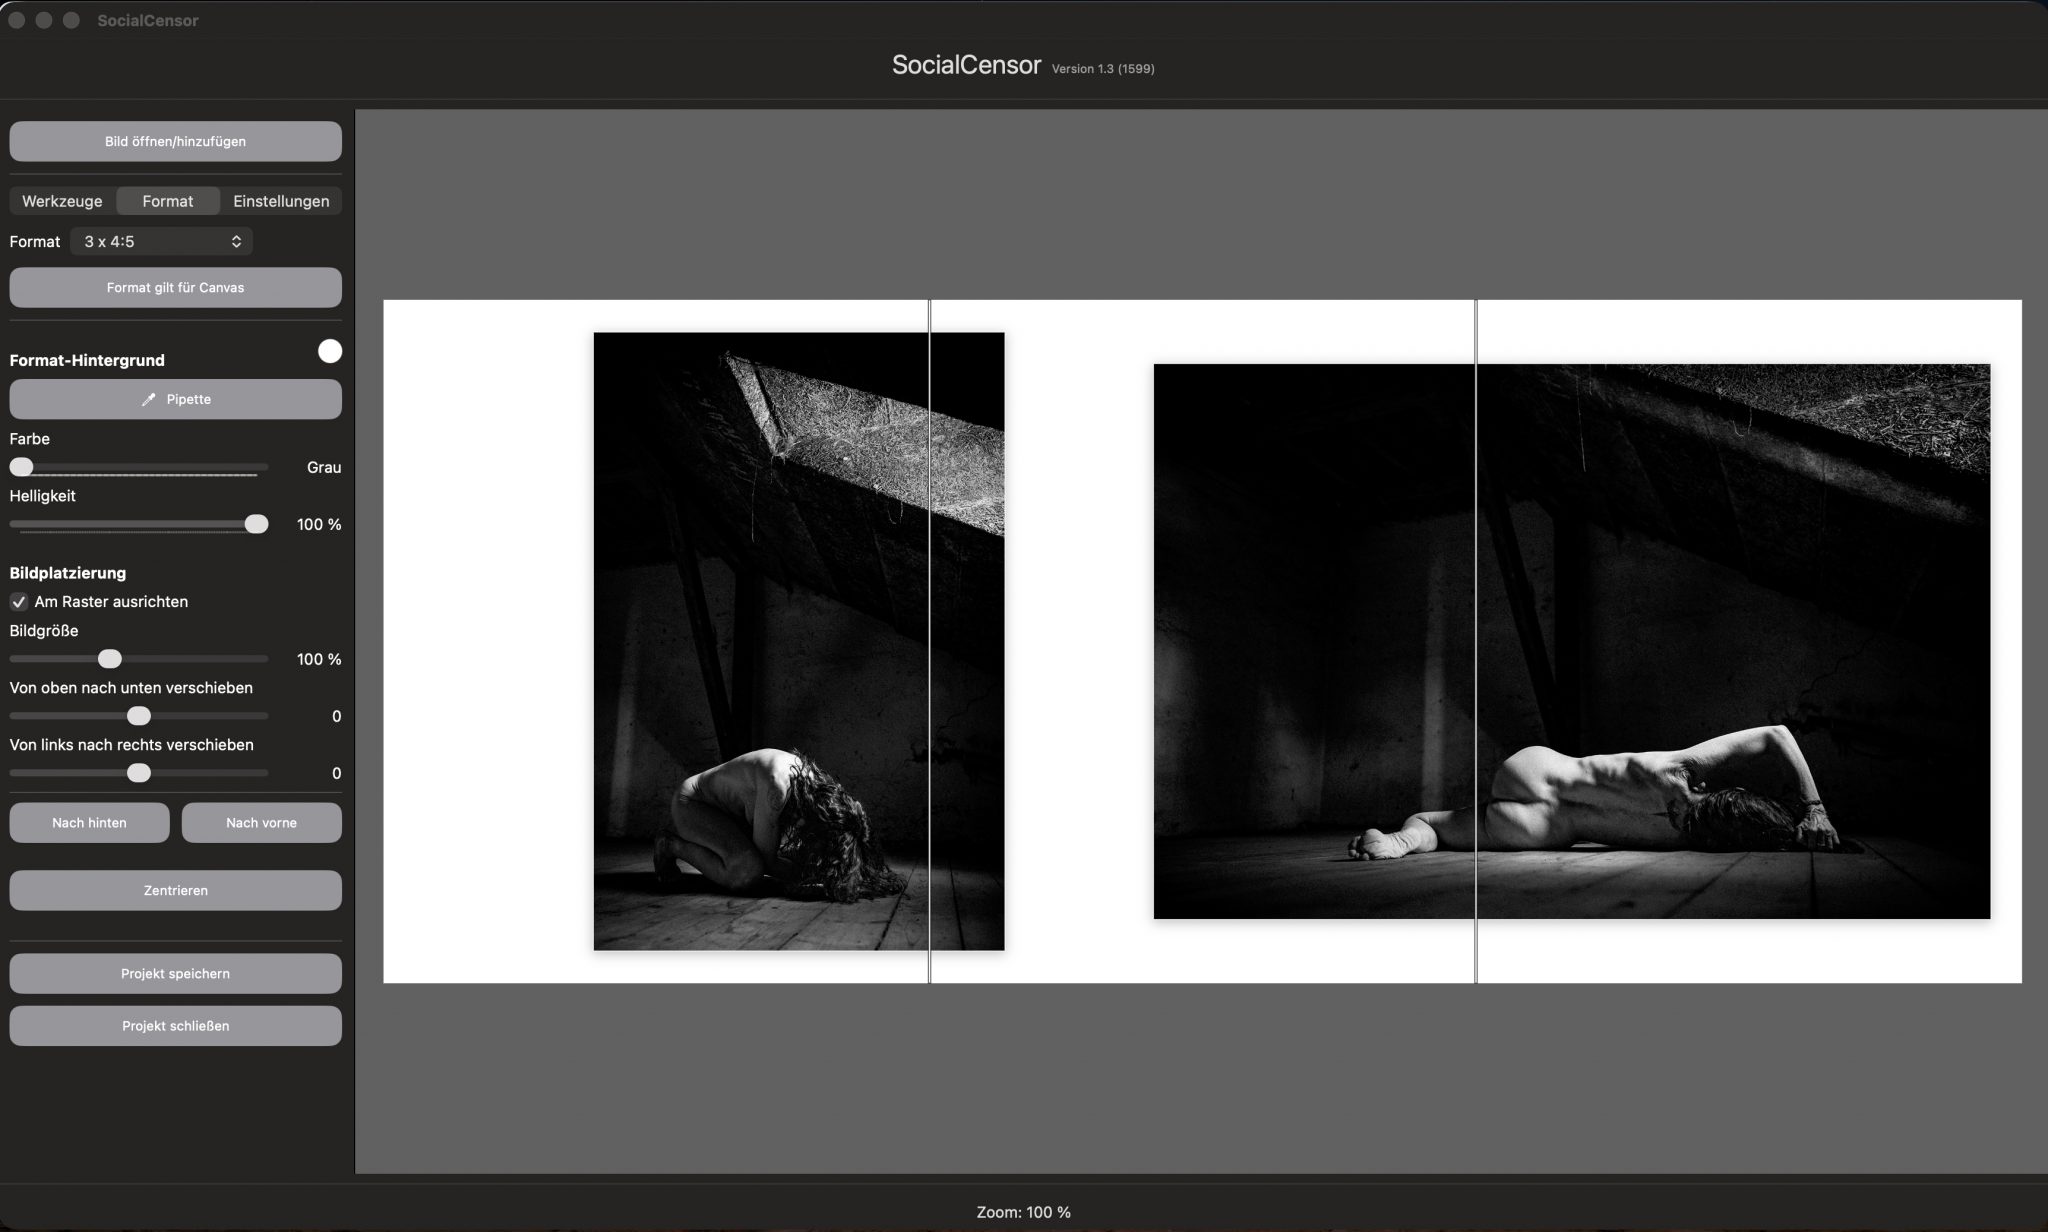
Eine schöne Spielerei für Instagram. Bilder über die Bildgrenzen hinaus verschieben, damit sie als drei einzelne Bilder hochgeladen werden können.
9:16 Story oder reels
Story und Reel
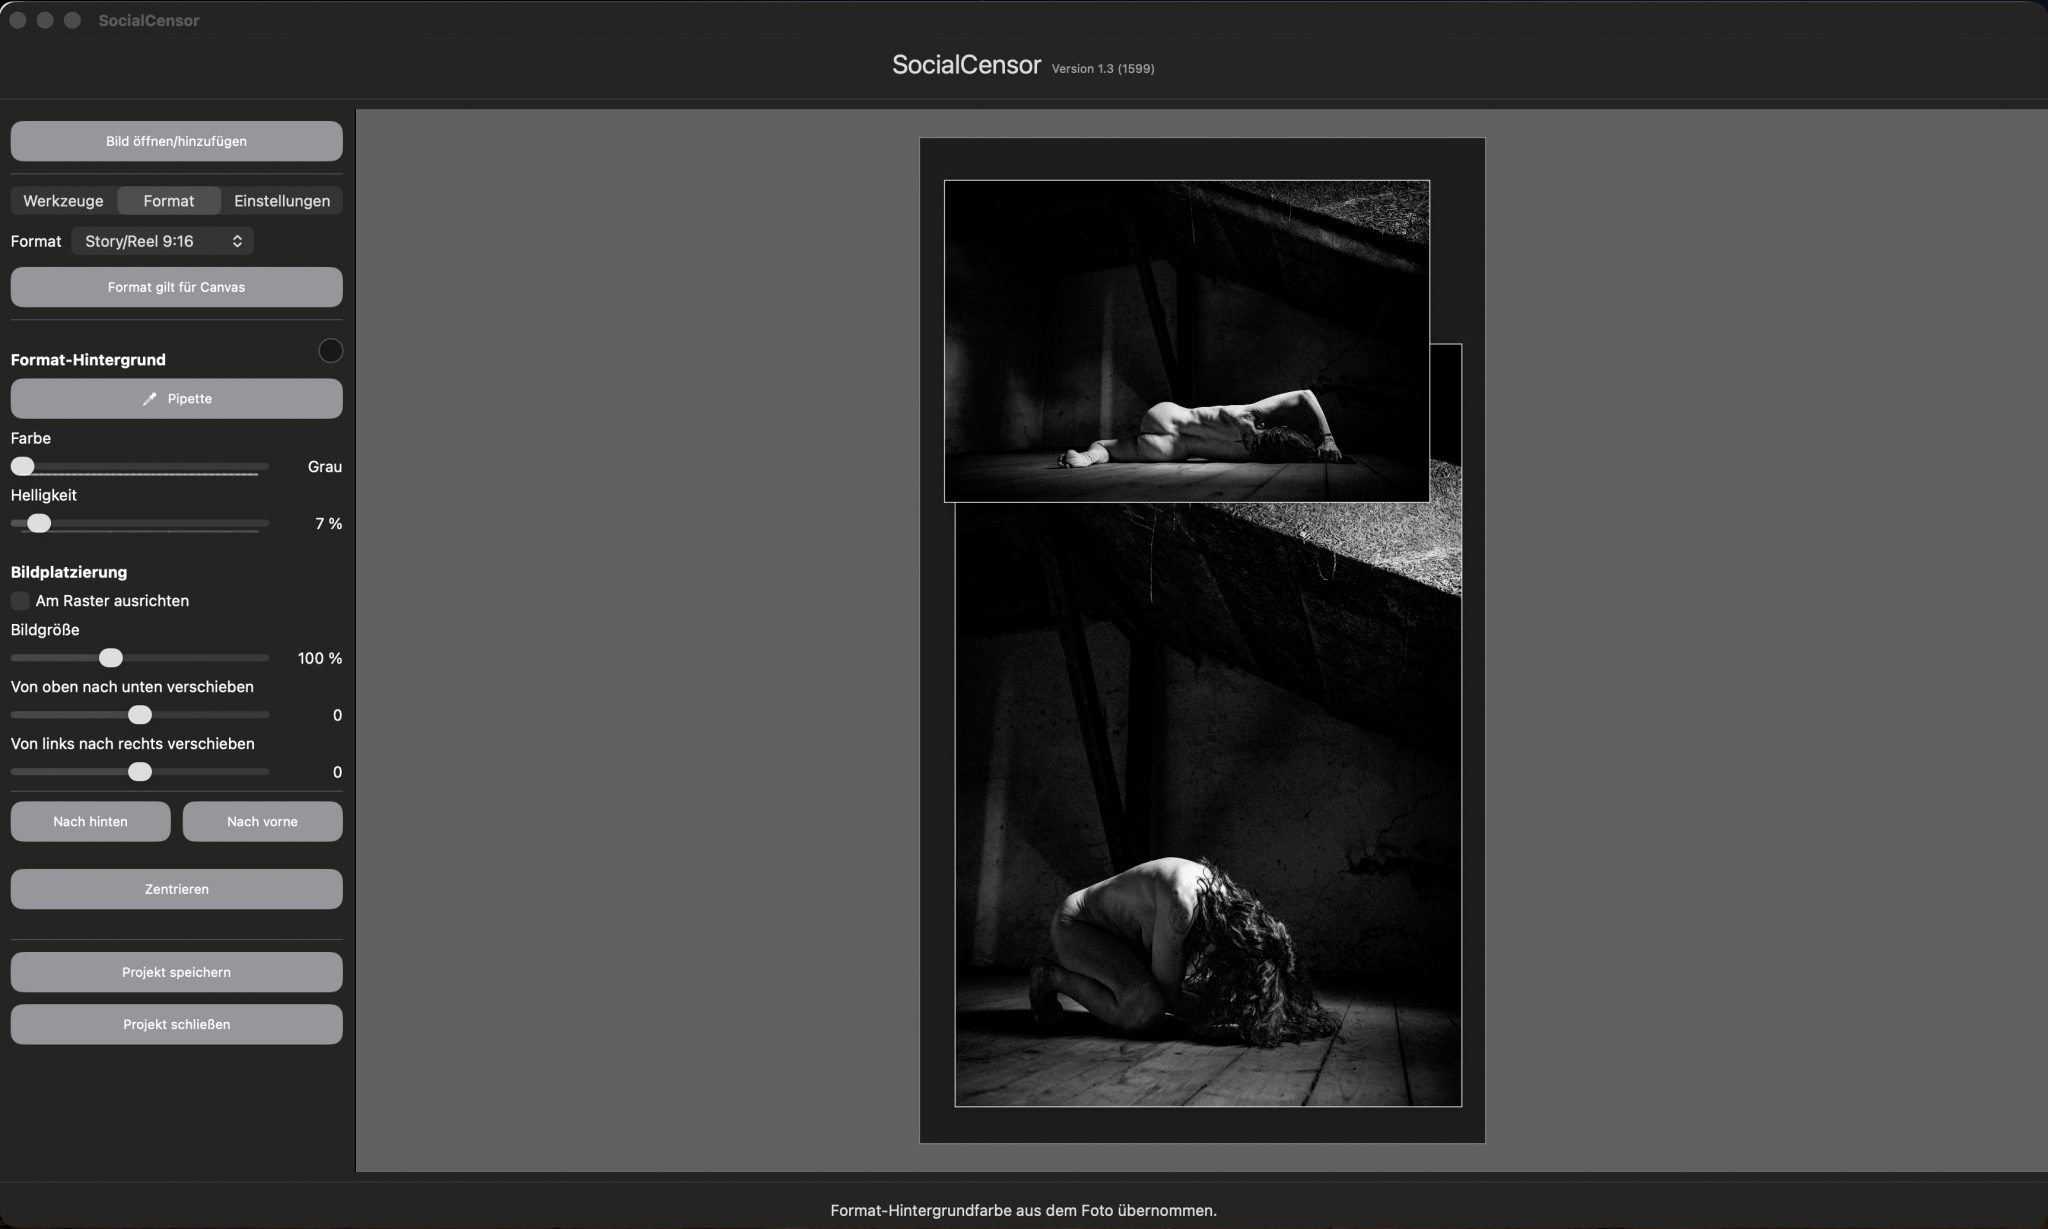
Auch für die Instagram-Story gibt es das passende Format. Hier mit einem dunklen Hintergrund.
1.91: 1 Querformat
Querformat
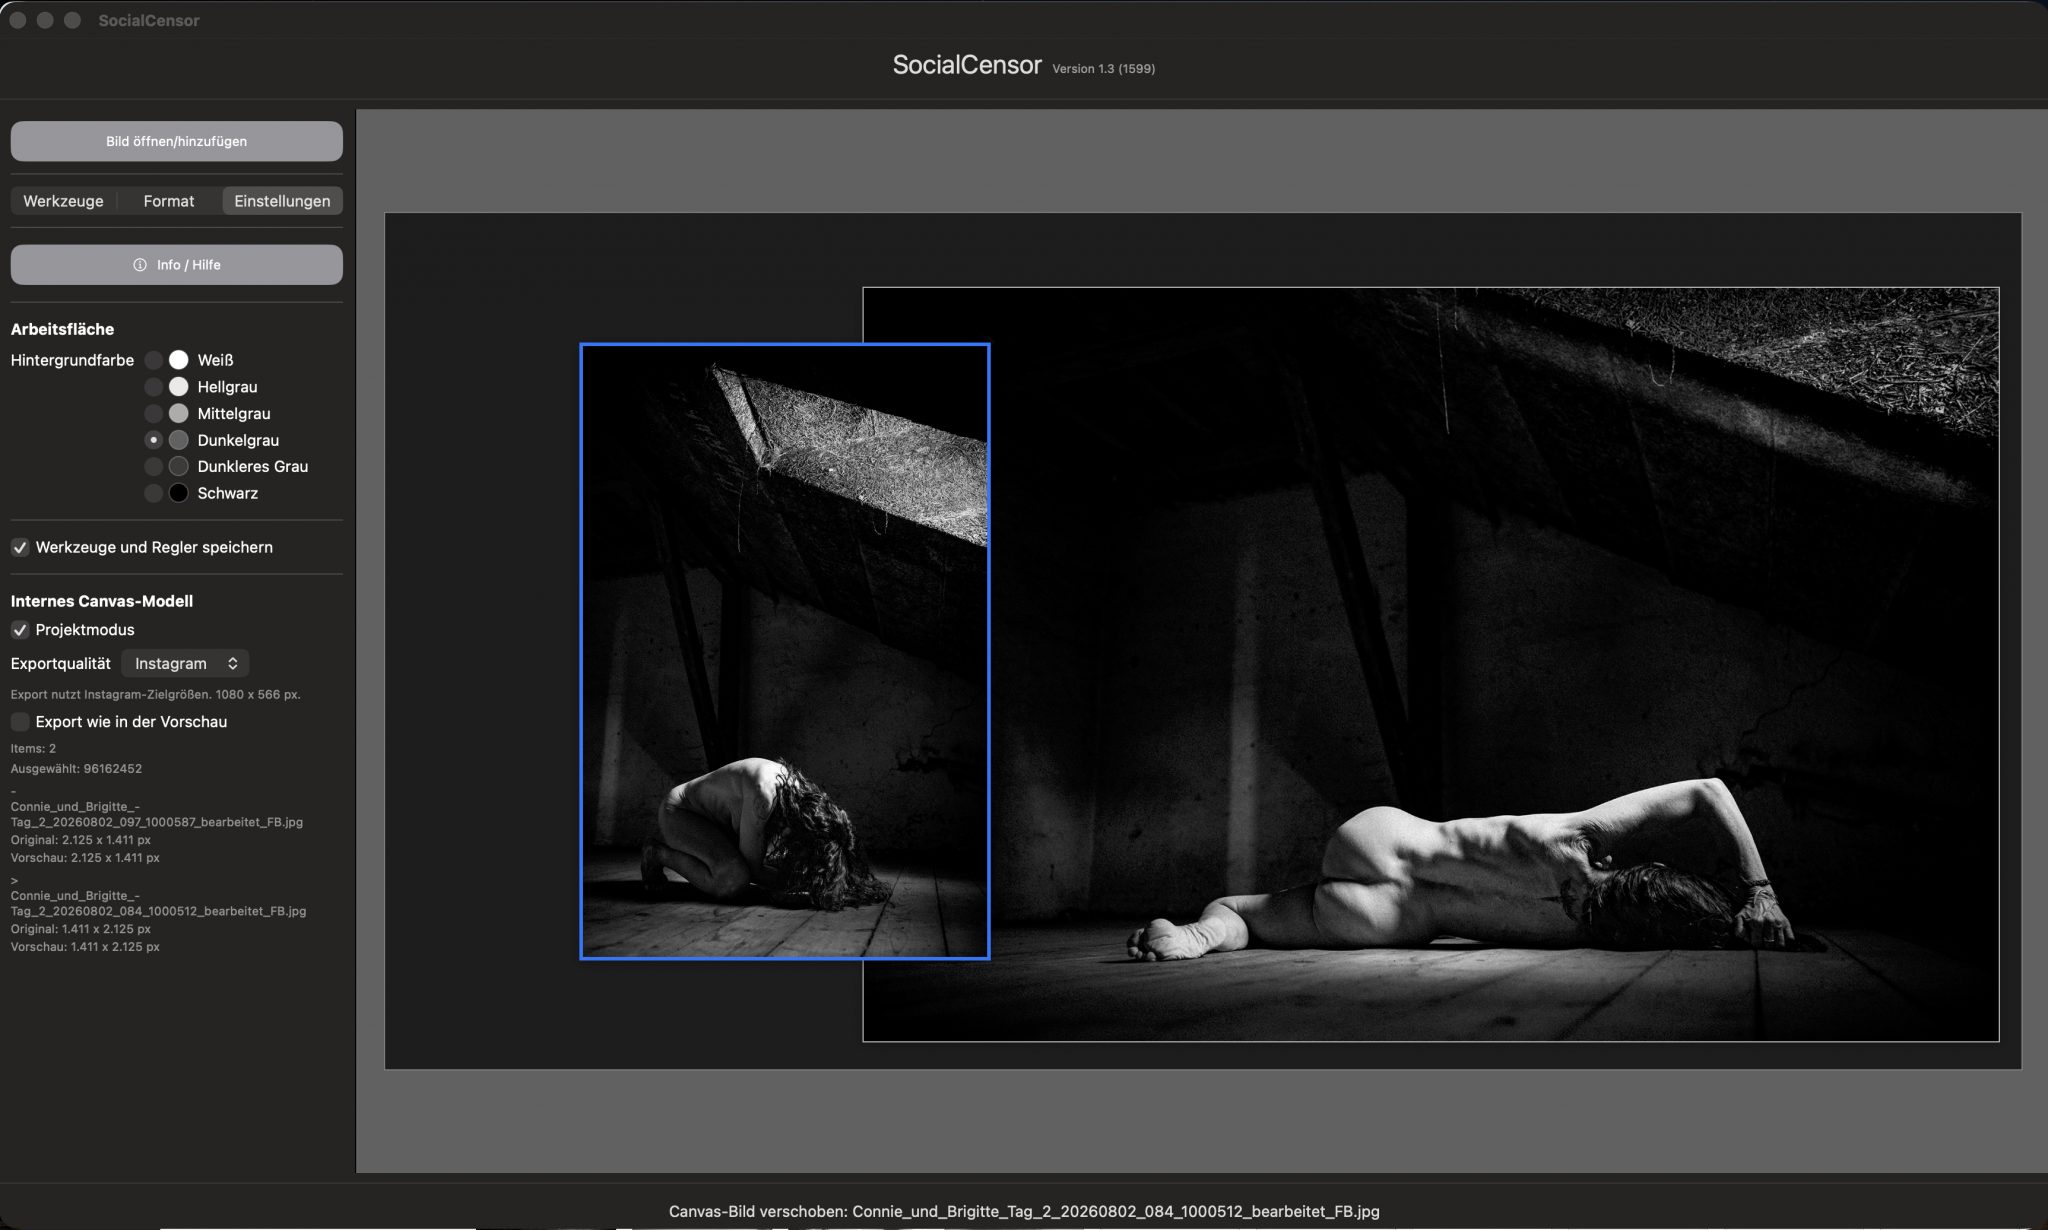
Ein besonders schräges Instramformat ist 1,91:1. Wer sich so etwas ausgedacht hat …
Projektexport
Export in drei Größen
Du kannst die fertigen Bilder in drei Größen exportieren lassen:
- Automatisch mit einer Kantenlängen von 2.125 px
- Premiumgröße angepasst an die Auflösung Deiner Bilder
- Instagramformat mit entsprechend geforderter Auflösung
Die nächsten Ideen
Text-Canvas
Ab Version 1.4 werde ich ein Texttool zur Verfügung stellen. Mit einem weißen/farbigen Hintergrund oder mit einem transparenten Hintergrund.
Quick-Tip 1
Wenn Du im iPhone oder im iPad (iOS-Version) ein Foto in SocialCensor bearbeiten und dann auf z.B. auf Instagram posten möchtest, geht es am schnellsten mit diesen drei Schritten.
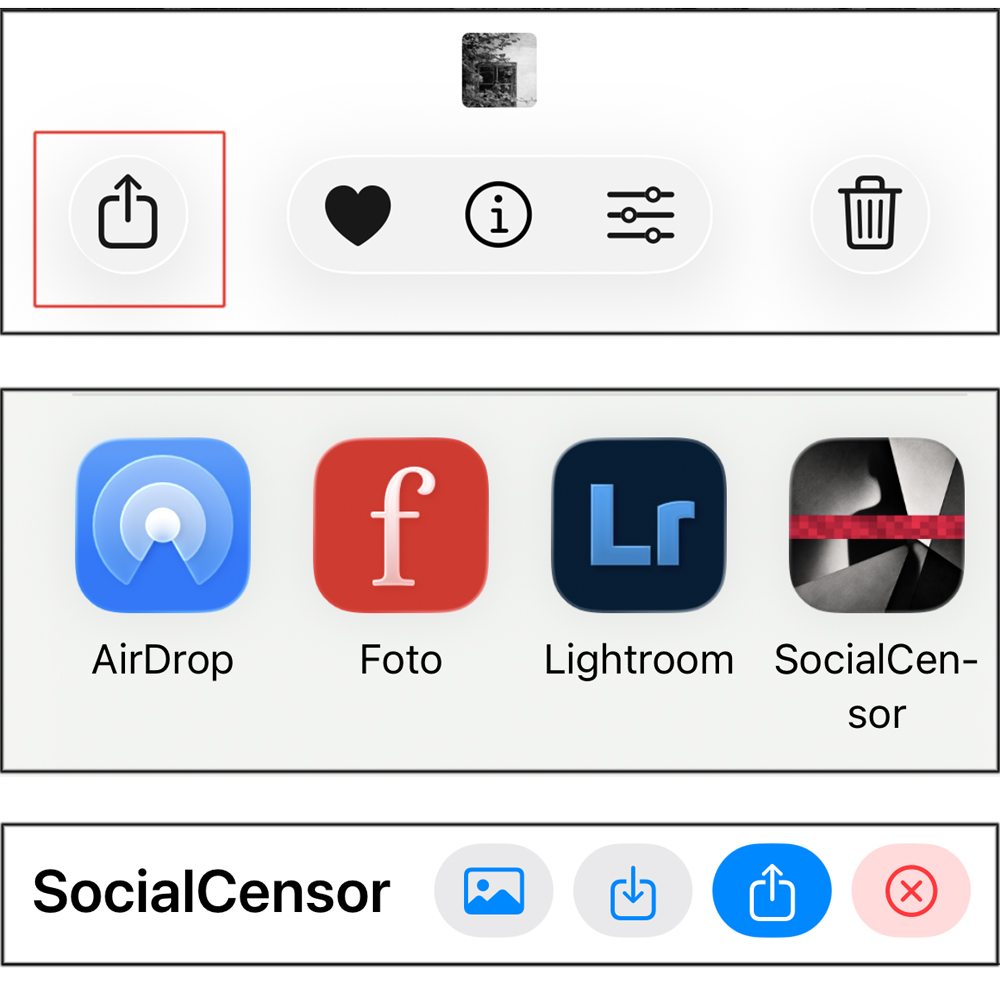
2. SocialCensor auswählen
3. Nach dem Bearbeiten wieder „Senden an“ auswählen

Senden an
Wähle das Bild in Deiner Mediathek aus und schicke es per „senden an“ an SocialCensor.
Falls Du SocialCensor nicht unter den Favoriten von „senden an“ findest, öffne ein Foto und tippe auf das Teilen-Symbol. Wähle Mehr → Bearbeiten und füge SocialCensor mit + zu den Favoriten hinzu. Danach erreichst Du SocialCensor direkt über das Teilen-Menü.
Bearbeiten
Das Foto ist nun automatisch zu SocialCensor hochgeladen worden.
Bearbeite es hier nach Deinen Wünschen und klicke dann oben in der Menüleiste wieder auf „Senden an“ in der SocialCensor-App.
Wähle das Icon Deines sozialen Netzwerkes aus und schicke es per „senden an“ in Deinen Feed.
Quick-Tip 2
Wenn Du einen sehr kleinen Bereich verpixeln möchtest, wie zum Beispiel eine Brustwarze, kann ich folgende Einstellungen für Dich empfehlen. Natürlich ohne Gewähr, dass Instagram dass auch so akzeptiert.
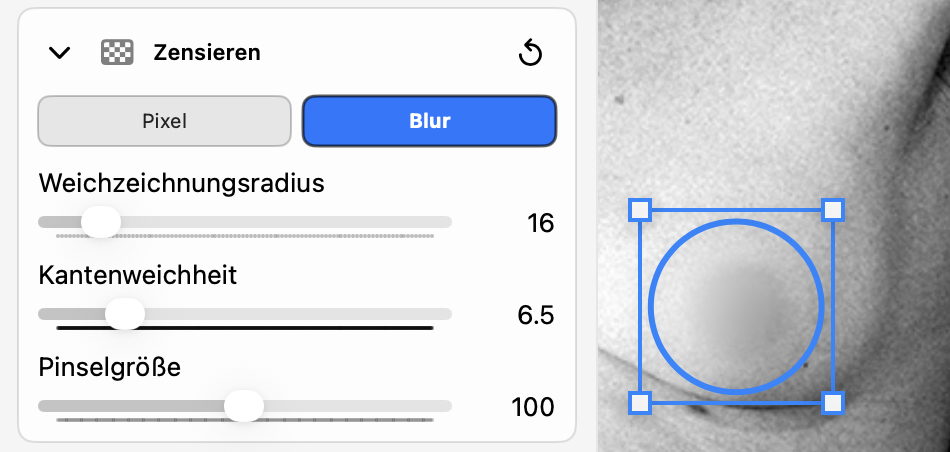
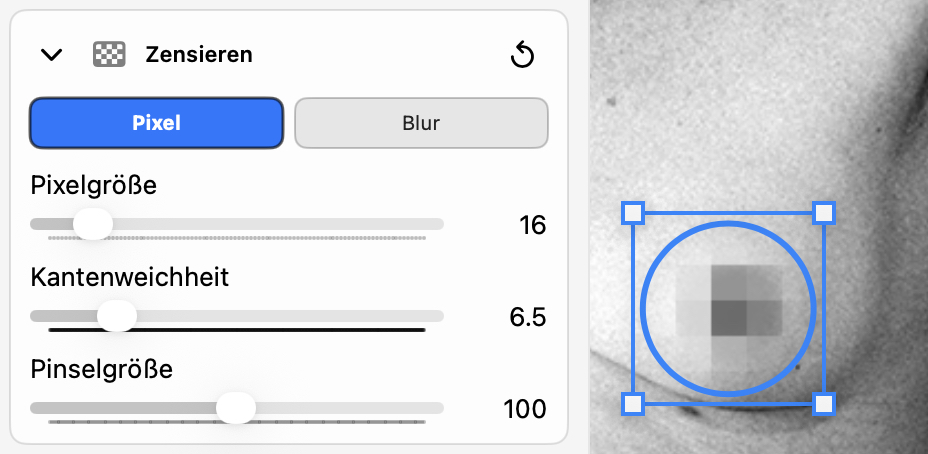
Verpixeln und weichzeichnen
Schritt 1: Zoome das Bild auf ungefähr auf das 2- bis 3-fache, also 200% bis 300 %, bis die Brustwarze ungefähr so groß zu sehen ist, wie in diesem Beispiel.
Schritt 2: Wähle eine Pinselgröße, die ungefähr doppelt so groß ist, wie die Brustwarze, lieber die Pinselgröße etwas größer wählen. In diesem Beispiel war die Pinselgröße 100 passend.
Schritt 3: Wähle Pixel oder Blur. Die Pixelgröße oder den Weichzeichnungsradius stelle auf 16 ein und die Kantenweichheit auf 6.5
Schritt 4: Klicke einmal auf die Brustwarze. Damit müsste der Bereich zensiert sein.
Schritt 5: Wenn Dir der zensierte Bereich zu groß oder zu klein ist, klicke auf  Bereich bearbeiten in der Kachel Aktionen und ziehe den gewählten Bereich kleiner oder größer.
Ein Rechtsklick auf den Bereich und -> Bereich kopieren, dann die zweite Brustwarze wählen, wieder ein Rechtsklick auf die zweite Brustwarze und -> Bereich einfügen spart Dir einiges an Arbeit.
Wenn Du weitere Erklärungen brauchst, schreibe mir bitte.
Natürlich auch, wenn Du Ideen für zukünftige Releases hast.