SocialCensor
Not everything is obvious.
Here you’ll gradually find all of SocialCensor’s features.
And if you’re still stuck, please feel free to get in touch with me. Your questions help me to improve this page.
These instructions apply to SocialCensor on Mac, iPad and iPhone. The user interface may look slightly different depending on the device, but the functions and steps described are largely the same up to version 1.2.
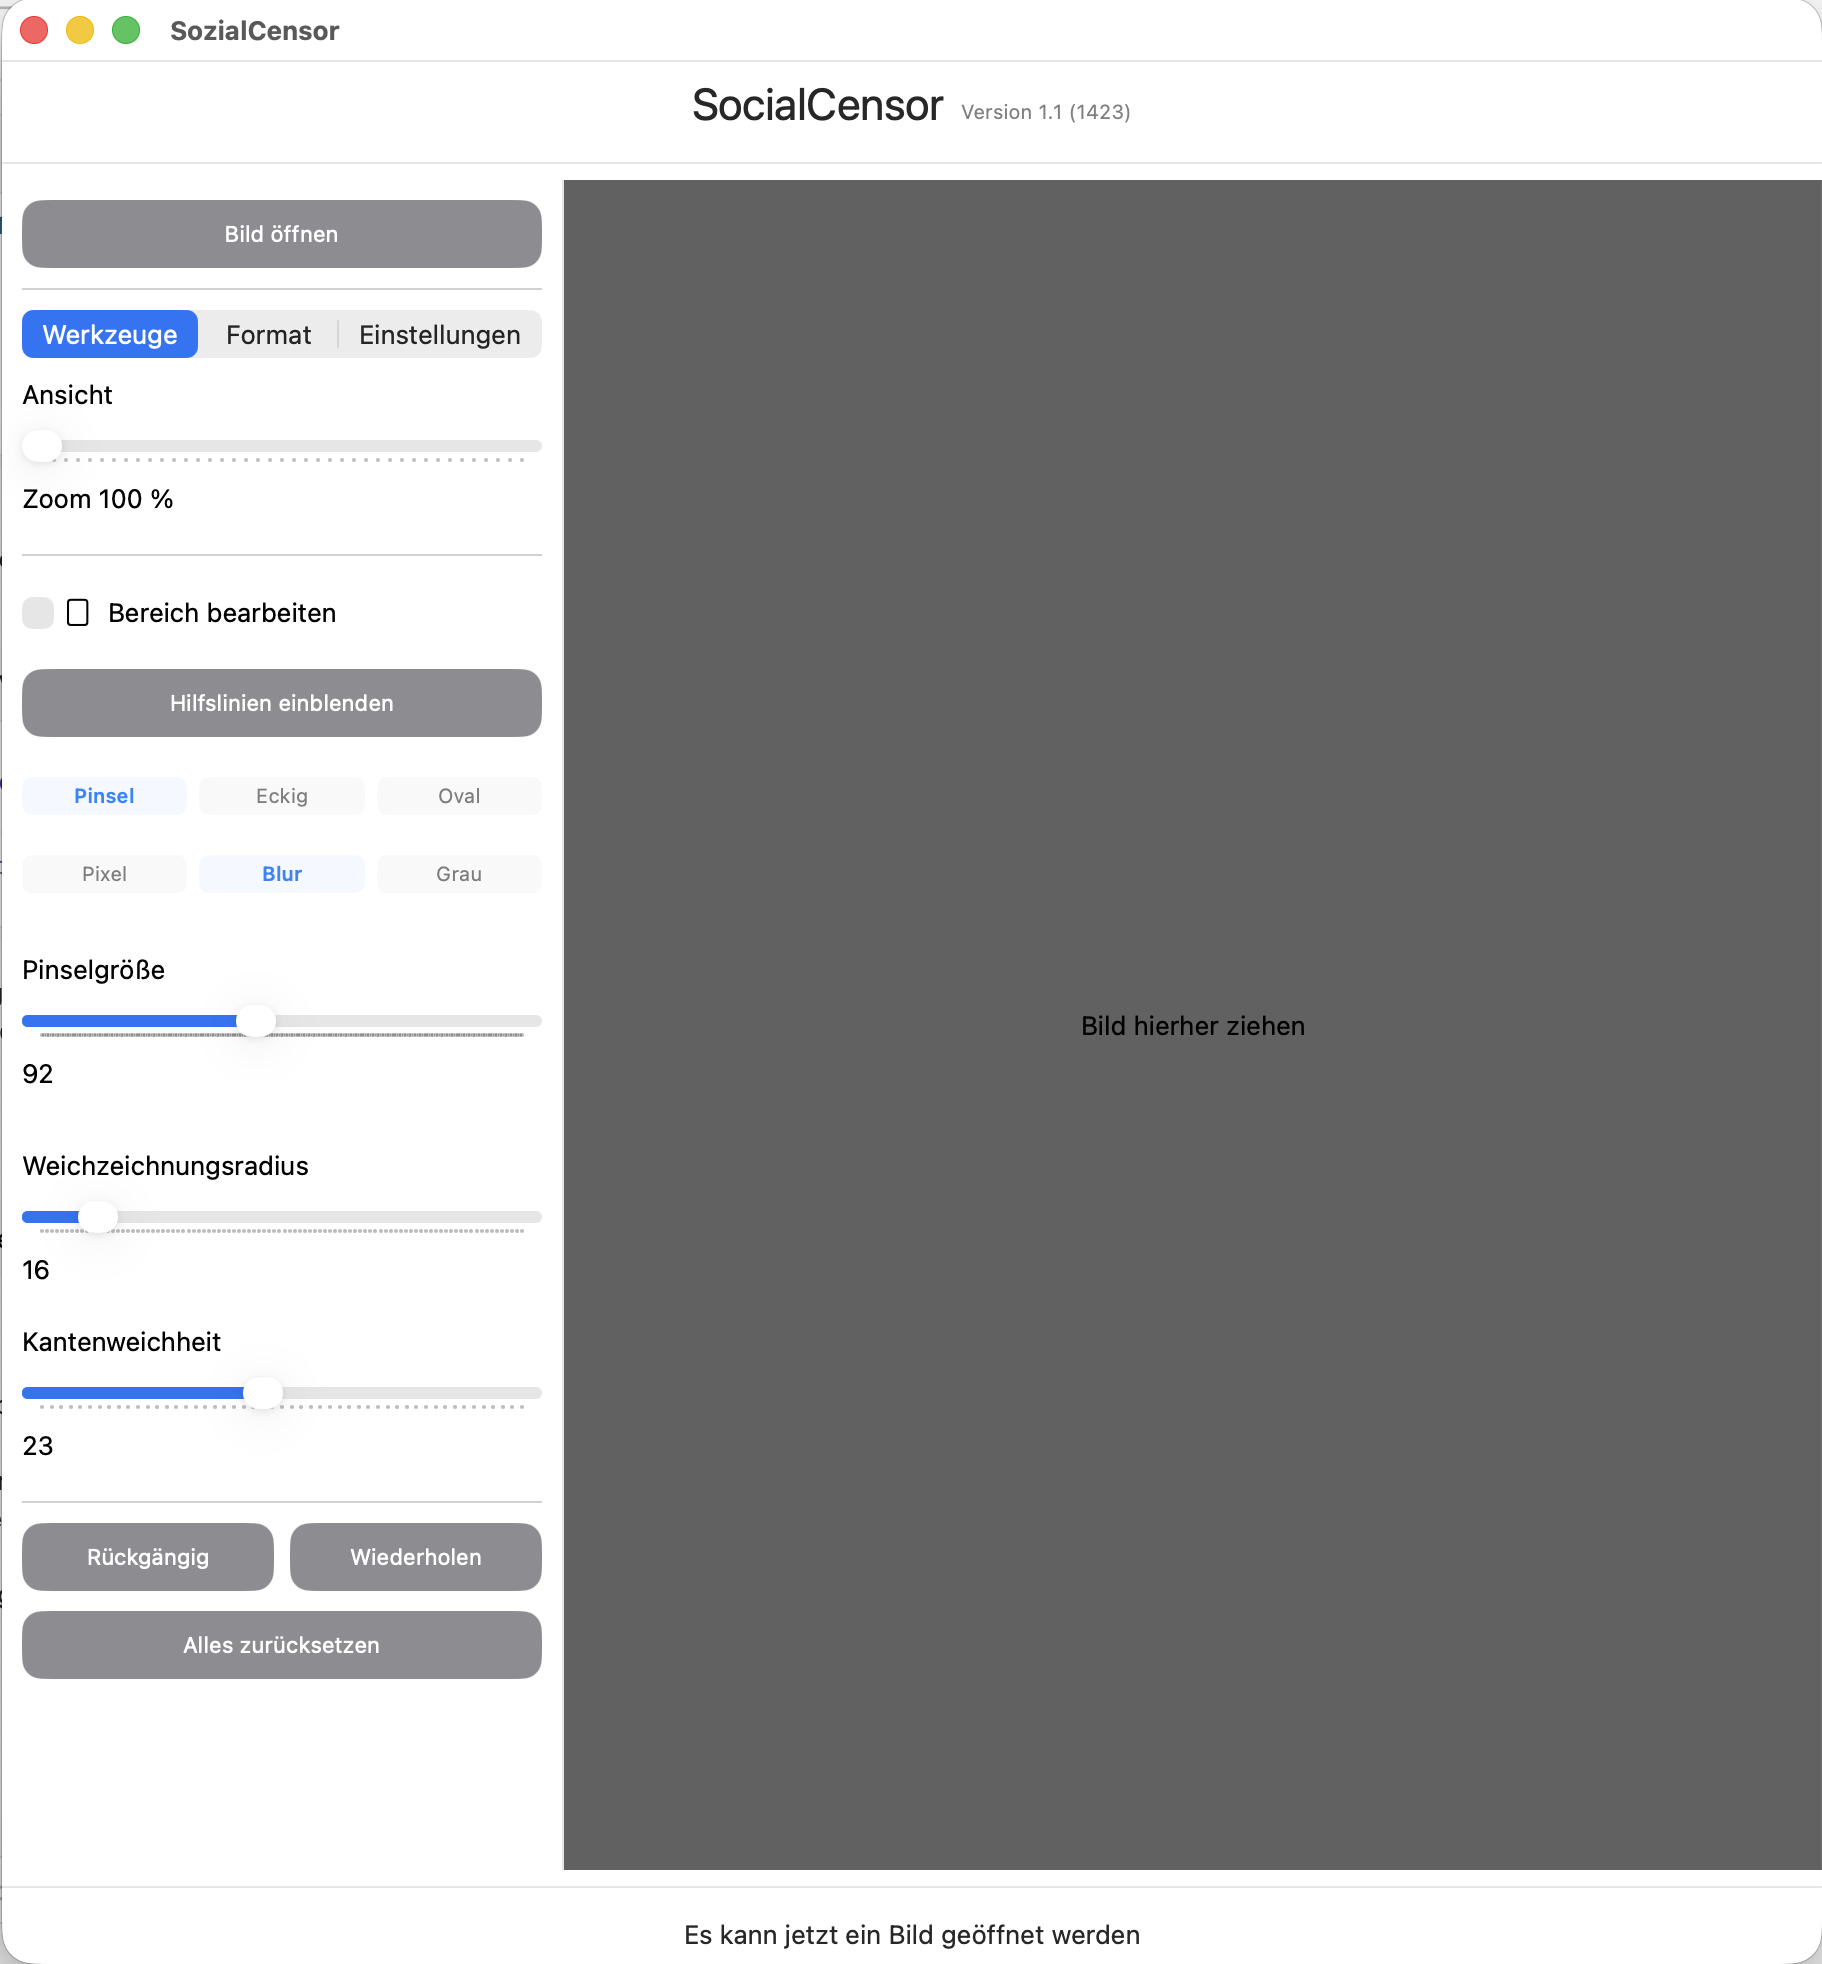
The layout of the app is almost identical across all versions. On the left (or at the bottom on iOS) is the workspace, and on the right is the image area.
With ‘Open Image’, you can open an image from your file system (macOS) or from the media library. You can also drag an image directly into the image area.
In the „Tools“ panel you can edit the image: Pixelate, blur or colour/black and white mark. A brush, a rectangle and an oval are available. You can make the edges a little softer.
You can enlarge the image to 500%, then move it, and then make your changes.
Any changes you make to the image will not be made to the original image. So you can try a lot of things without changing the original image.
Starting with version 1.3 you can also add multiple images to a project.
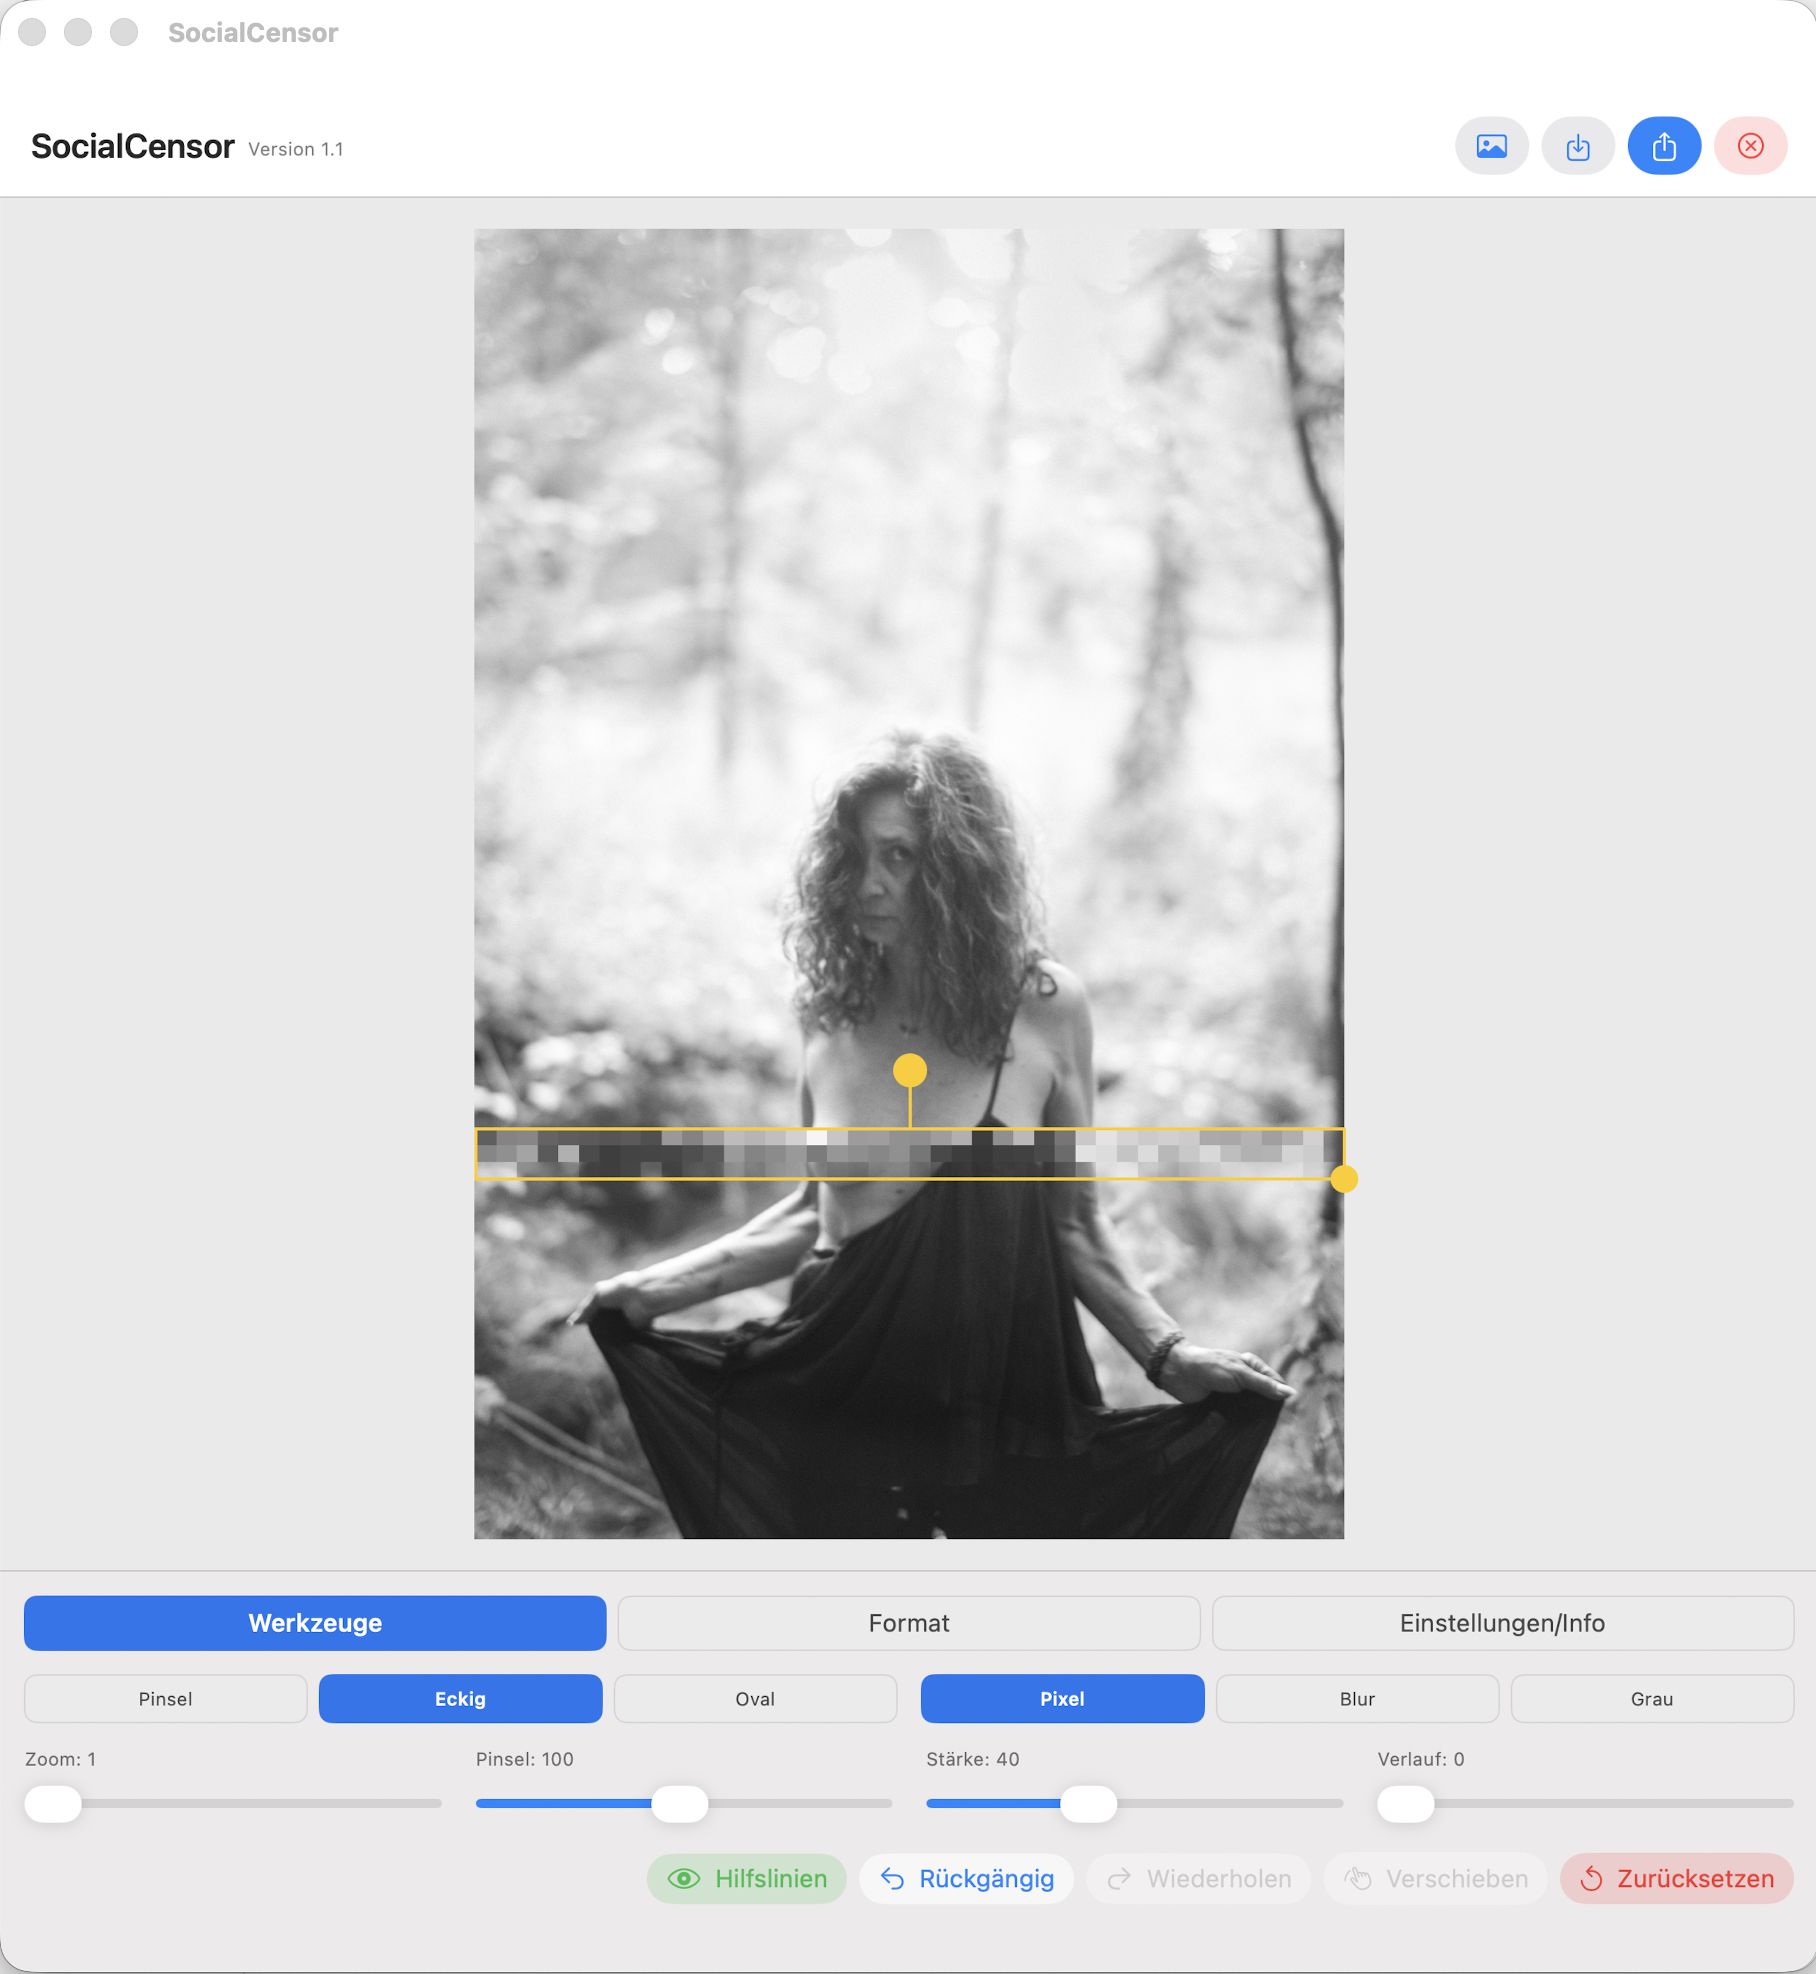
In this example, you will see the open image in the iPad version. A sensitive area is pixelated and marked with a yellow mark. That means you can move or rotate or minimise as you like.
In the bottom line is the button Guidelines. This allows you to show and hide the coloured frame.
You can change the size of the pixelation or the strength of the blur as well as a coloured or black and white centring.
If you don’t like the result, you can of course reset all changes.
In addition to the pixelation, you can blur the marked area or set it in colour.
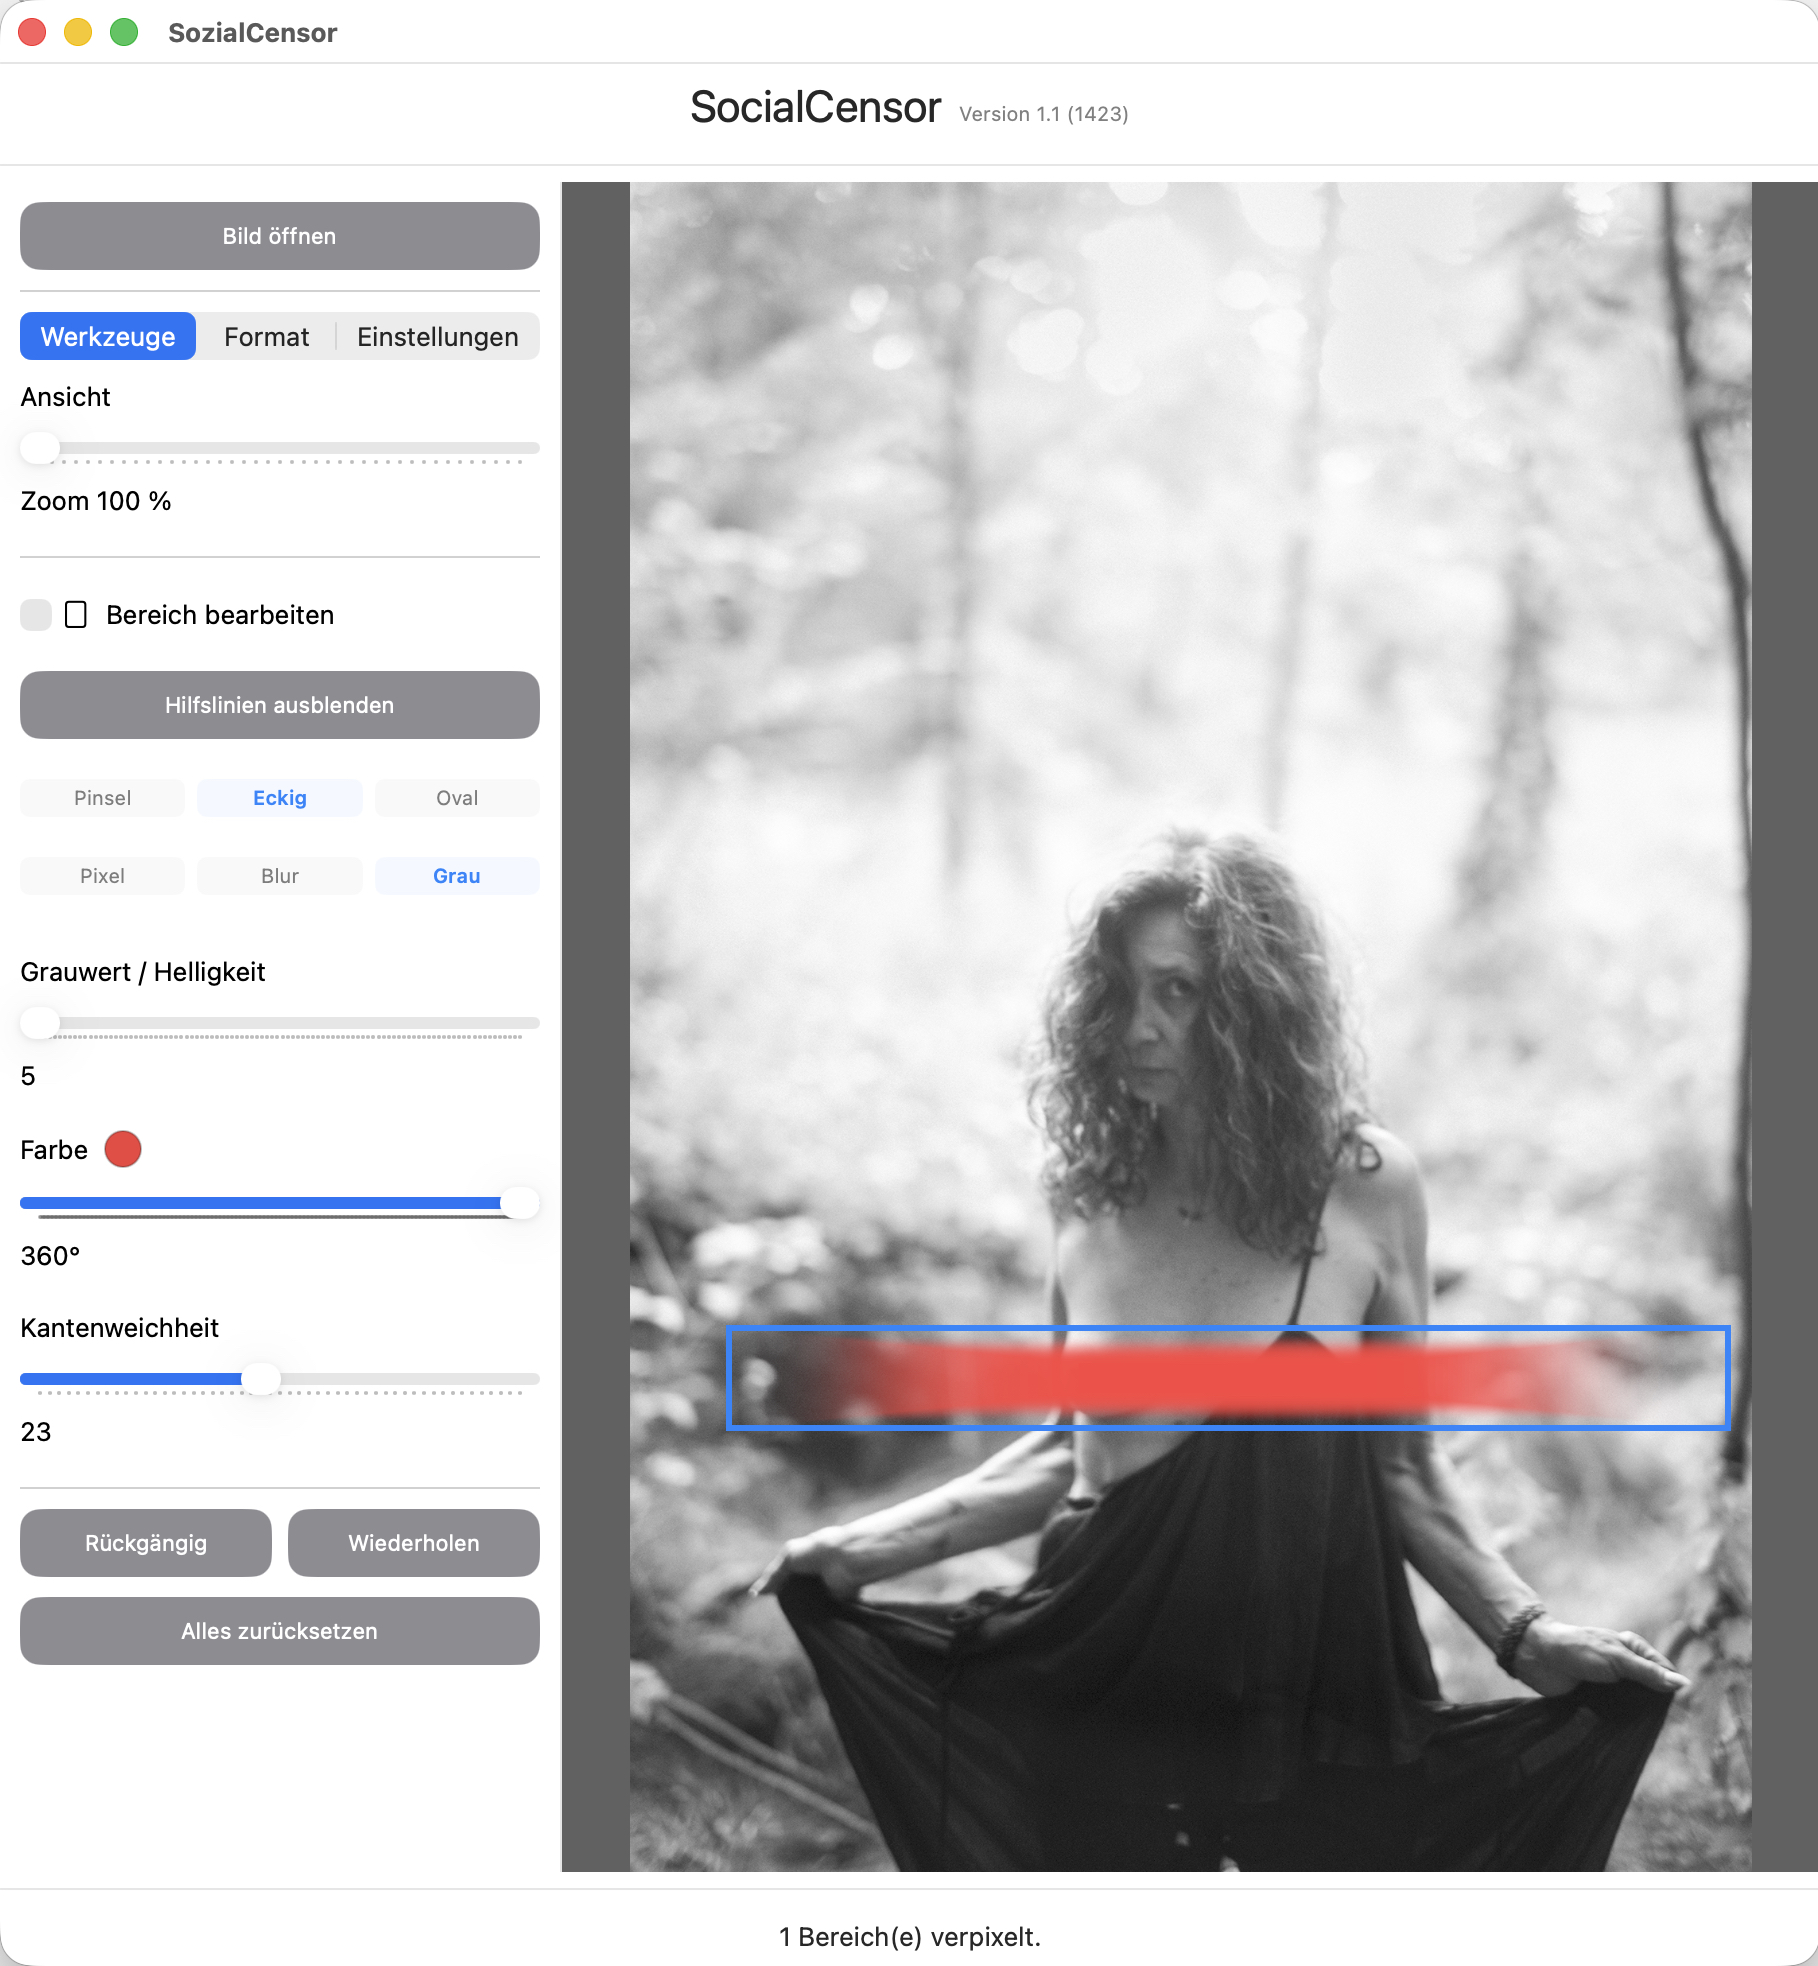
Here I have made a colour censorship, which is also represented with a soft edge.
You can also show and hide the guides in the Mac app and, of course, continue editing the selected area later.
If you like your work, you can switch to the panel format. There are some innovations there.
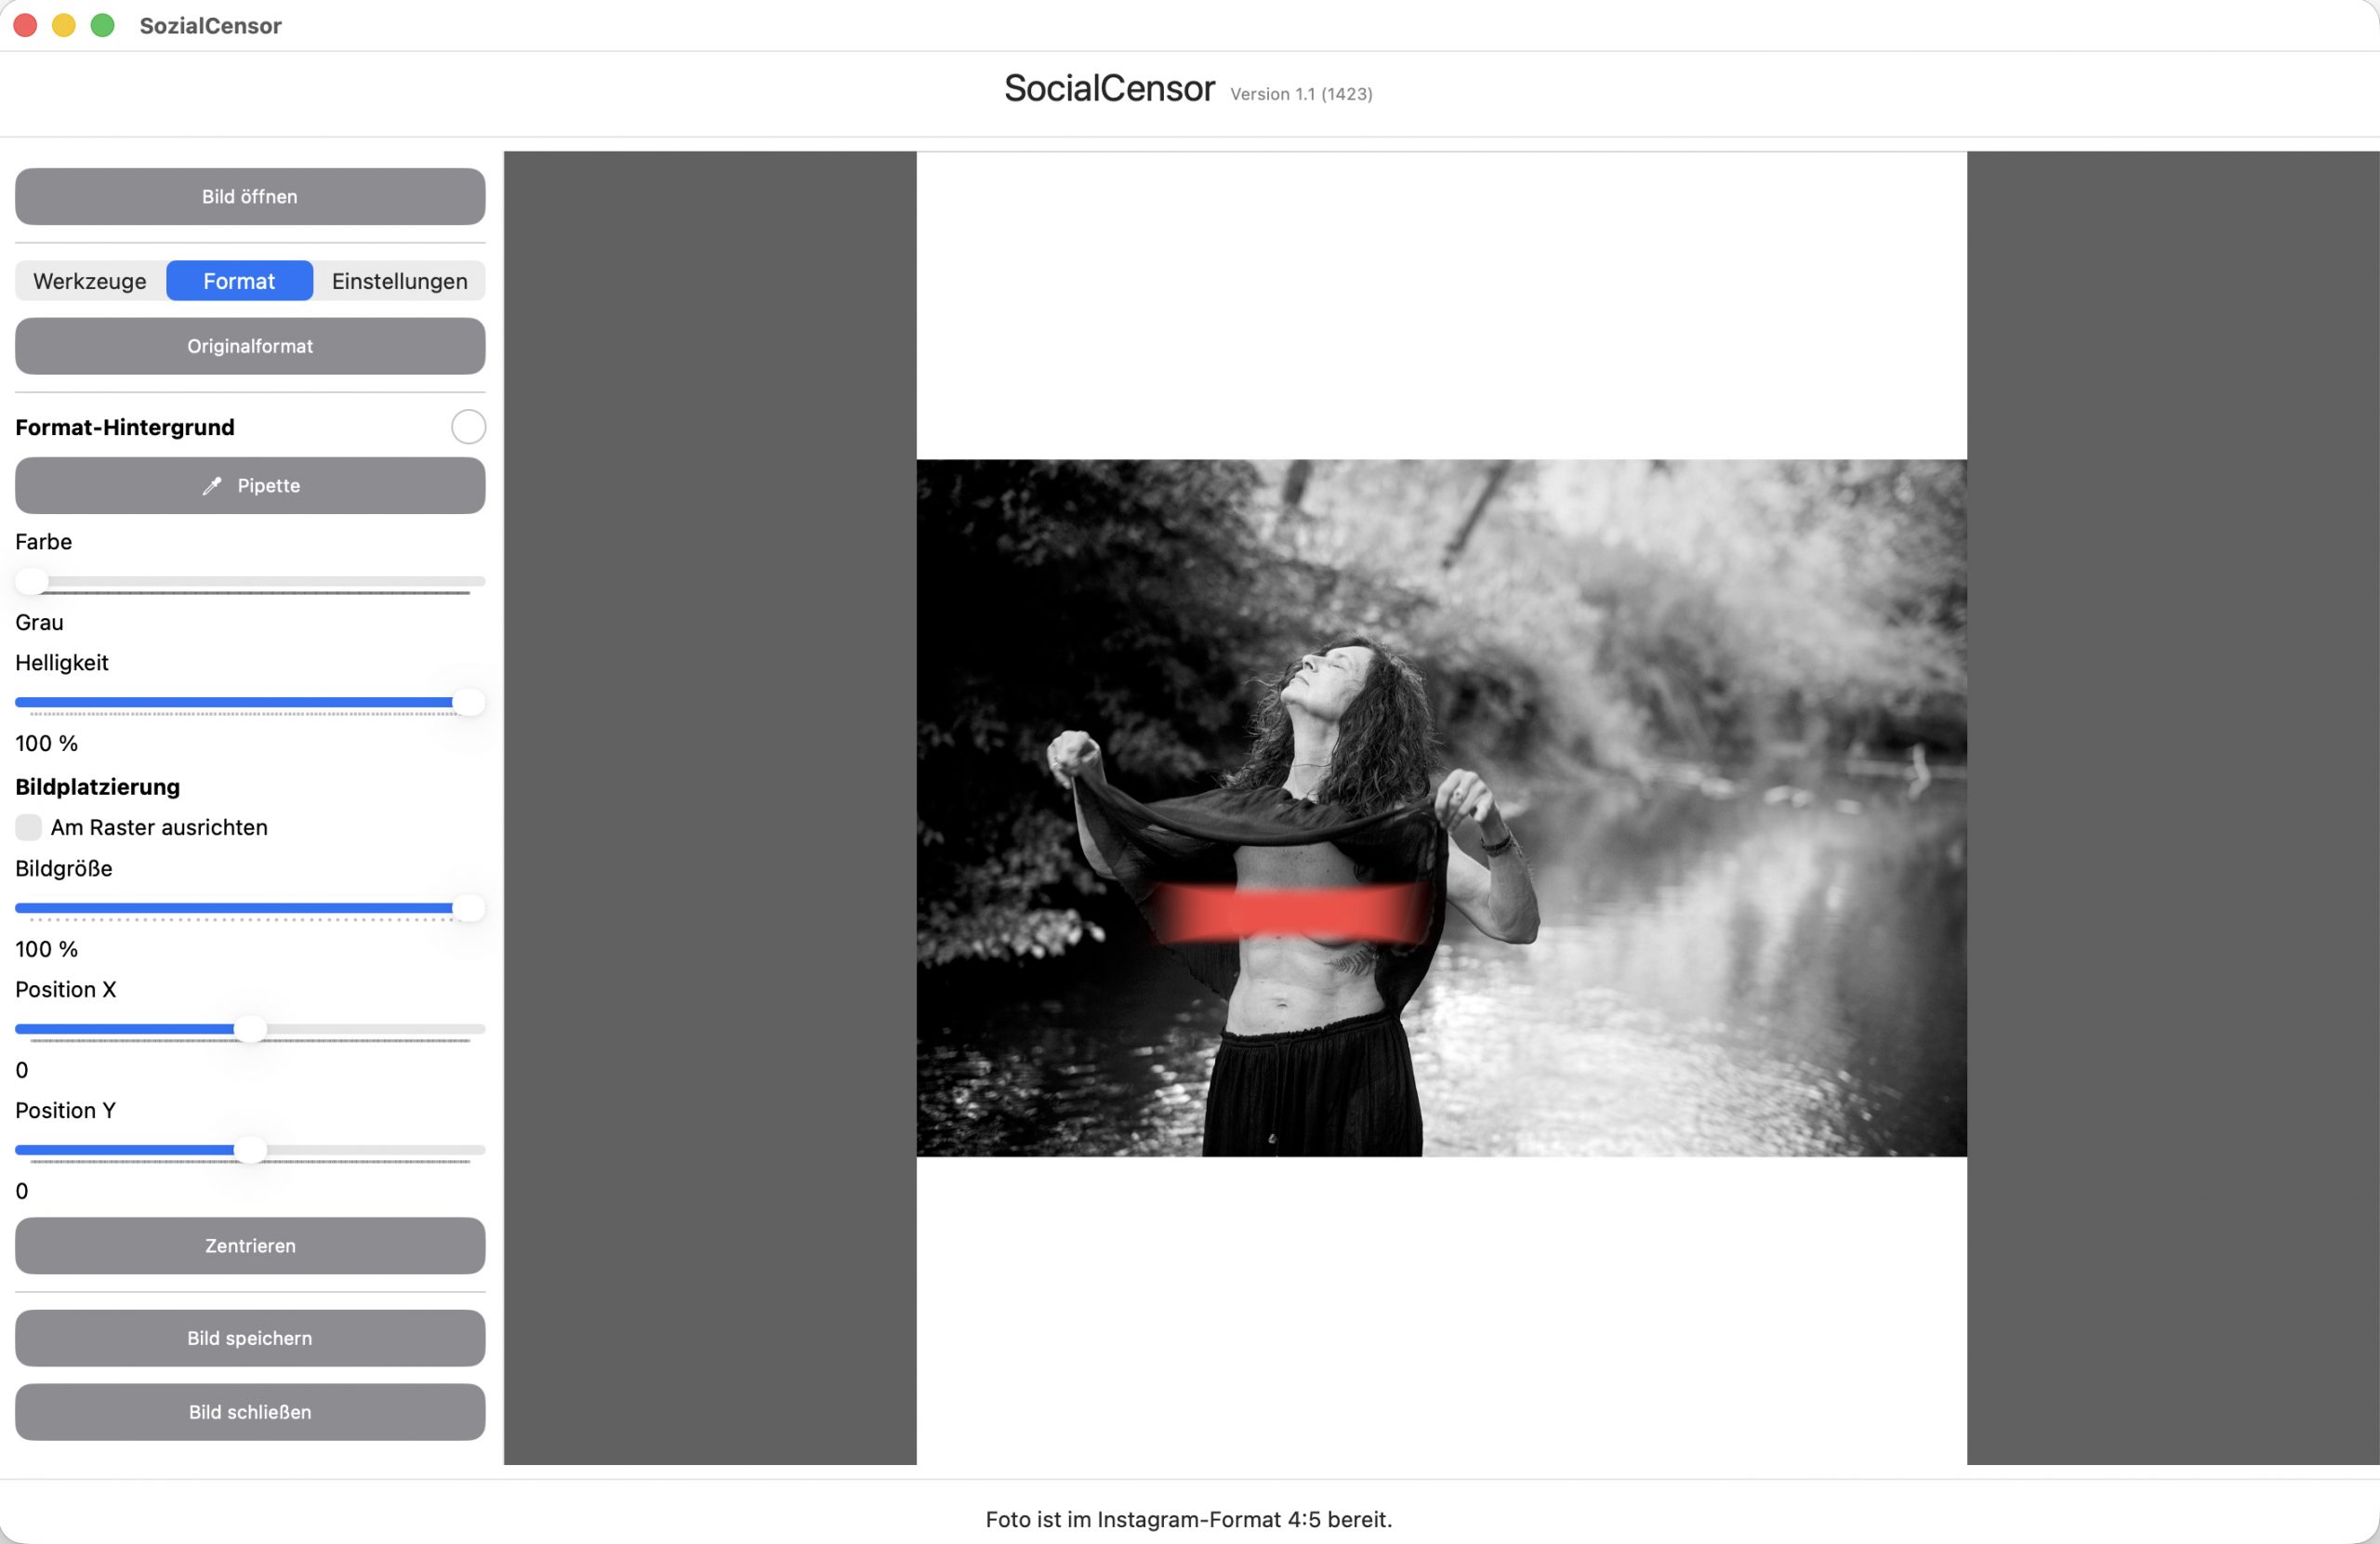
Did you know that the iOS app also runs on your MacBook if it has an Apple silicon processor, i.e. M1, M2, M3, M4, etc.
We are in the panel format and I have activated the Insta format 4:5. The format background is just set to white, but can also be coloured.
You can change the colours and grayscale via the controls or copy them from your image with the pipette.
In the Image Placement section, you can change the size of your image on the format background and then move it as you like. With Raster you get equal distances up / down and to the side.
A copy of your image is saved via Save Image, the original remains unchanged.
From version 1.2 you can select many more backgrounds that are based on Instagram’s specifications.
On the iOS app, you can then upload the image directly to Instagram via the Share button.
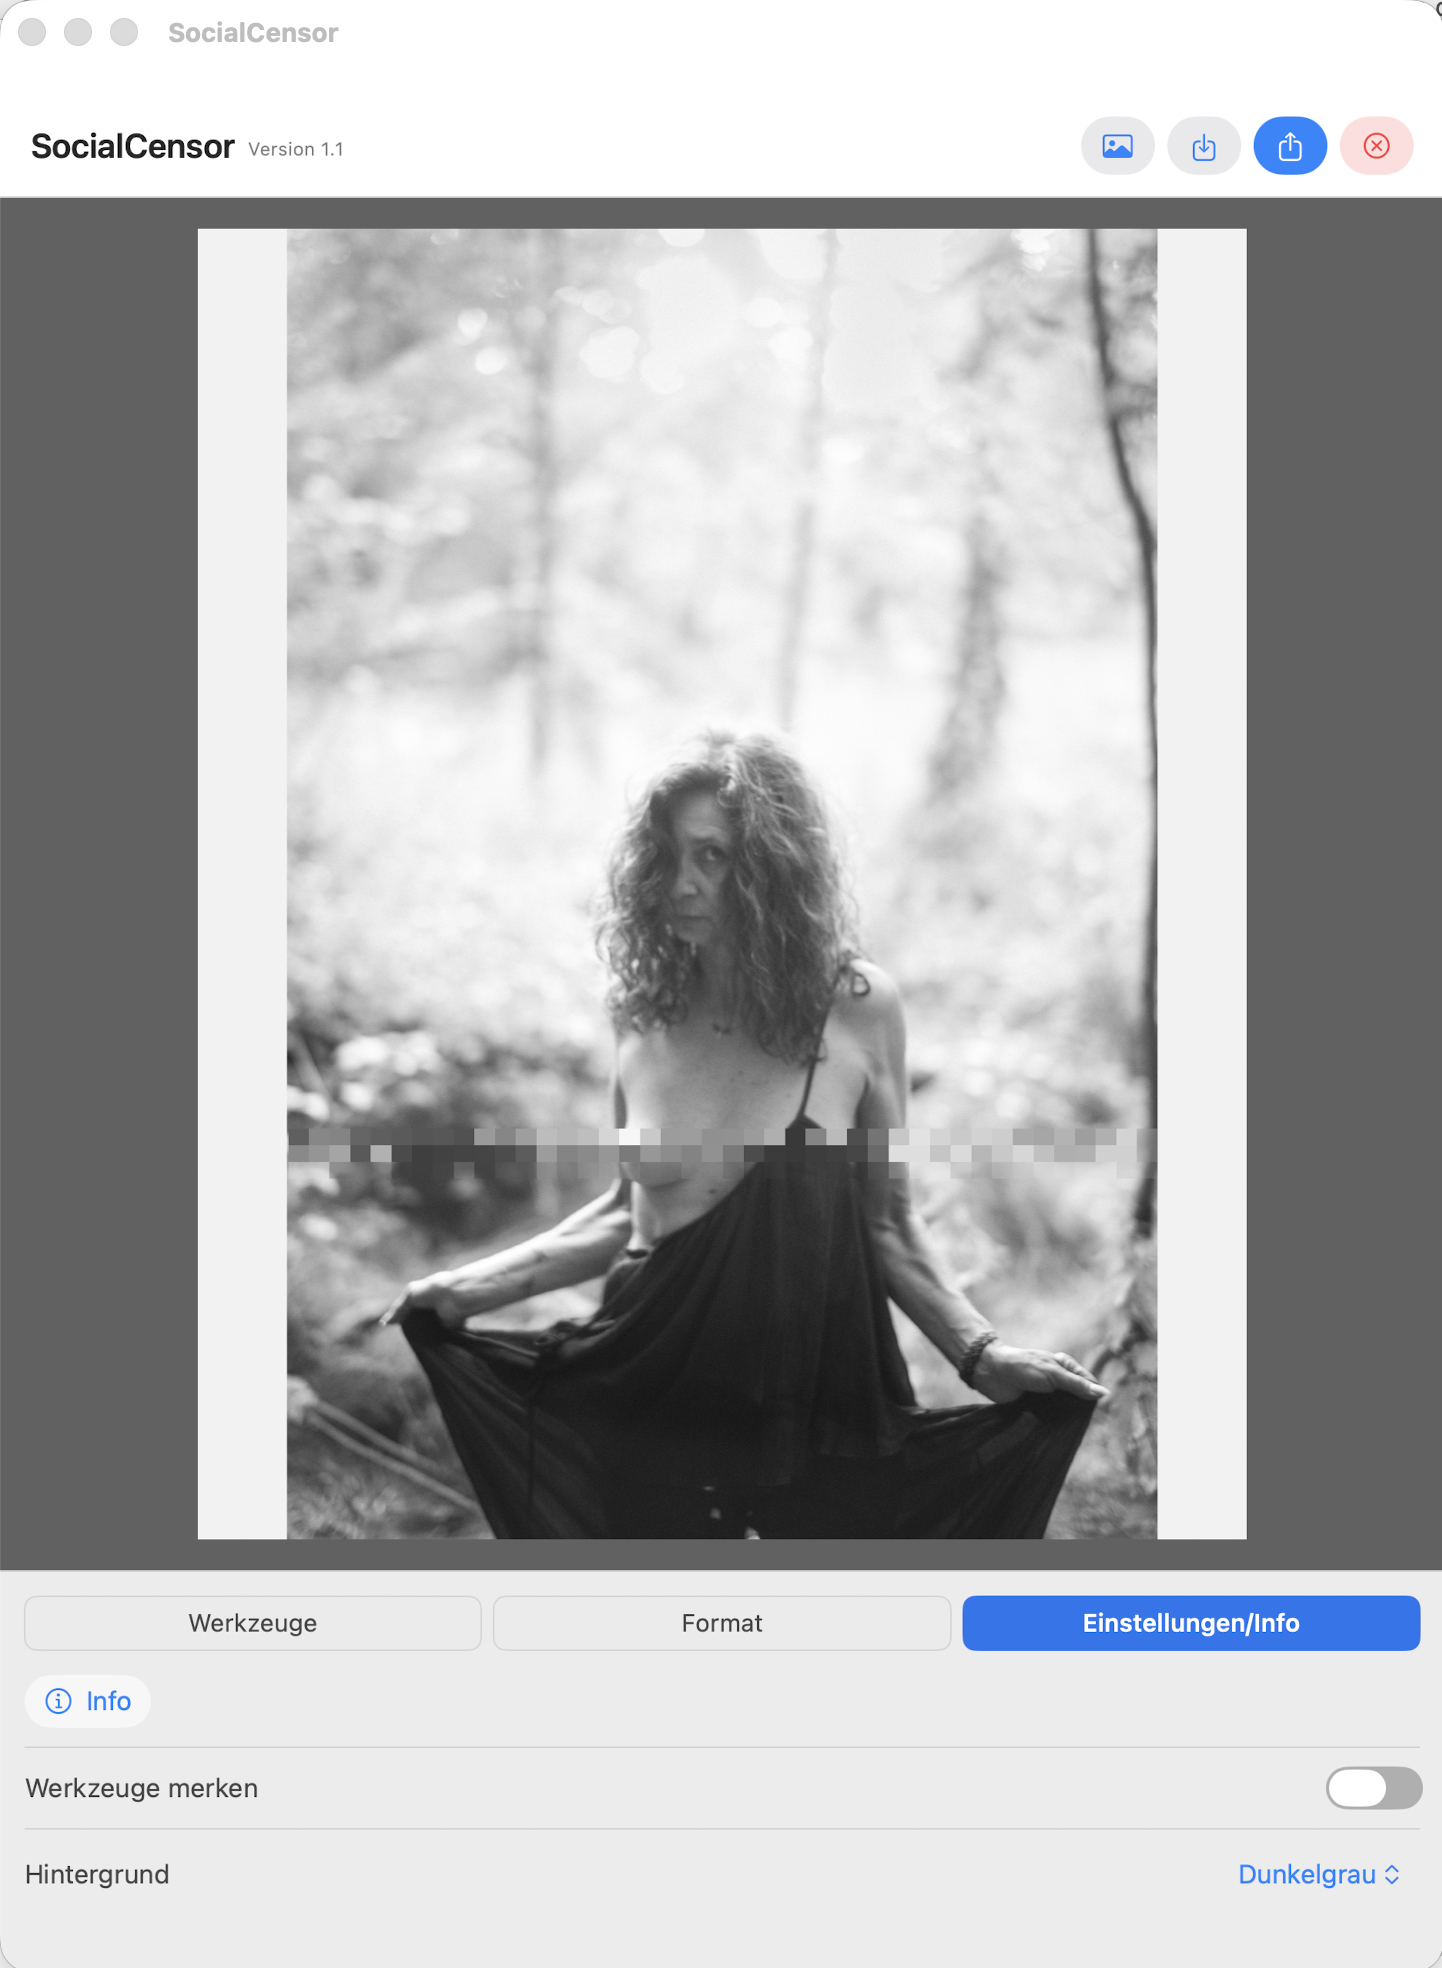
In the Settings / Info area you can specify whether the tools should be saved as you used them last time and you can change the background of the image area from white to black in different levels.
The info button takes you to a small info page, with a link to my website, where you can request support or shower me with suggestions for improvement.
At the top right, the red button deletes all your changes. Irrevocably. So please save it first.
DISCOVER MORE
More formats and more ideas from version
1.2 / 1.3 / 1.4
1:1 – Quadrat
Canvas Quadrat
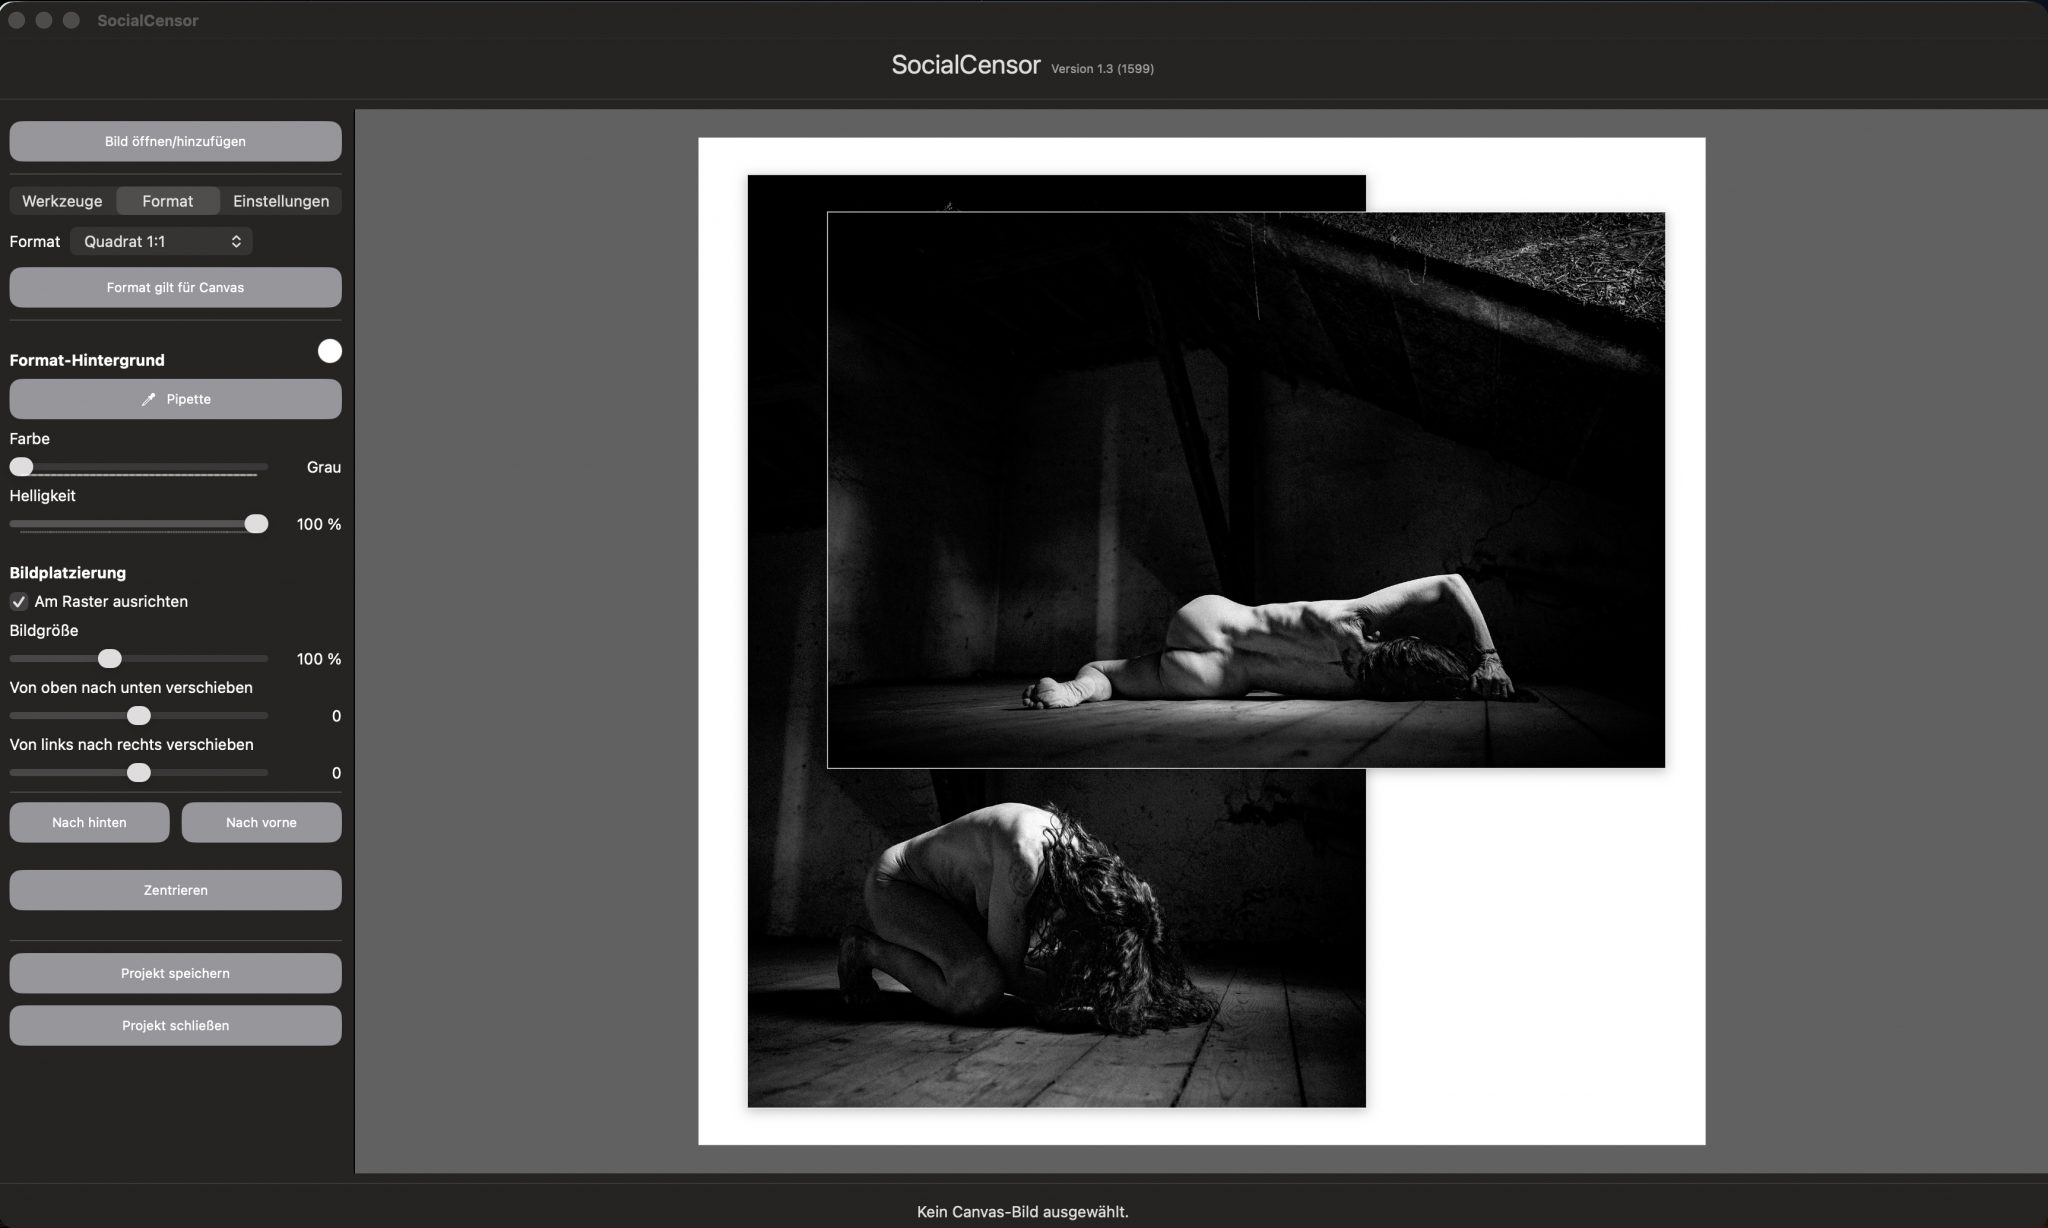
You can move the images freely on any background. Also on top of each other
3 * 4:5 – Triptychon
Triptychon
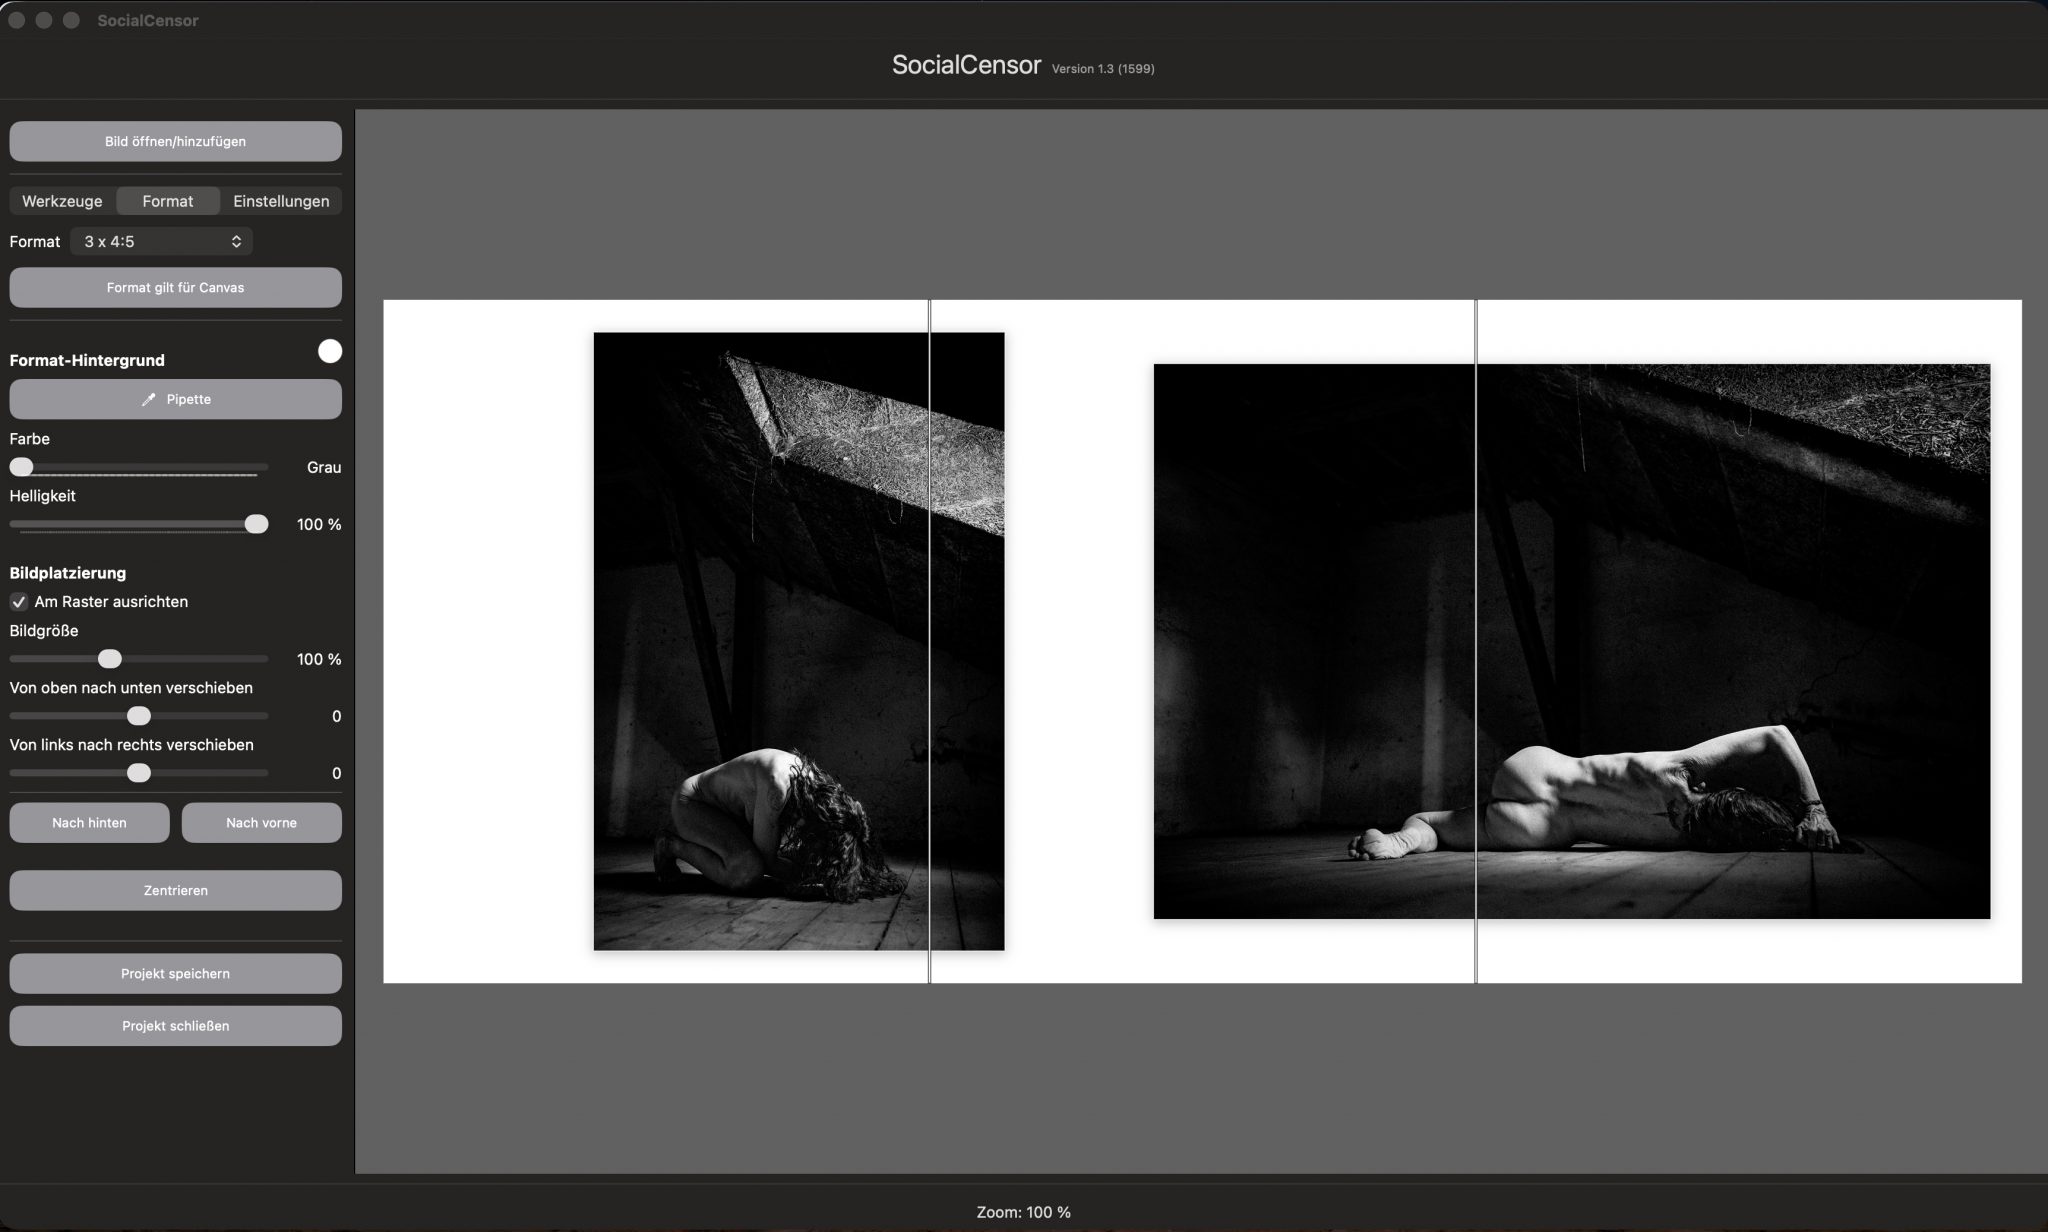
A nice gimmick for Instagram. Move images beyond the image limits so that they can be uploaded as three individual images.
9:16 STORY OR REELS
Story and Reel
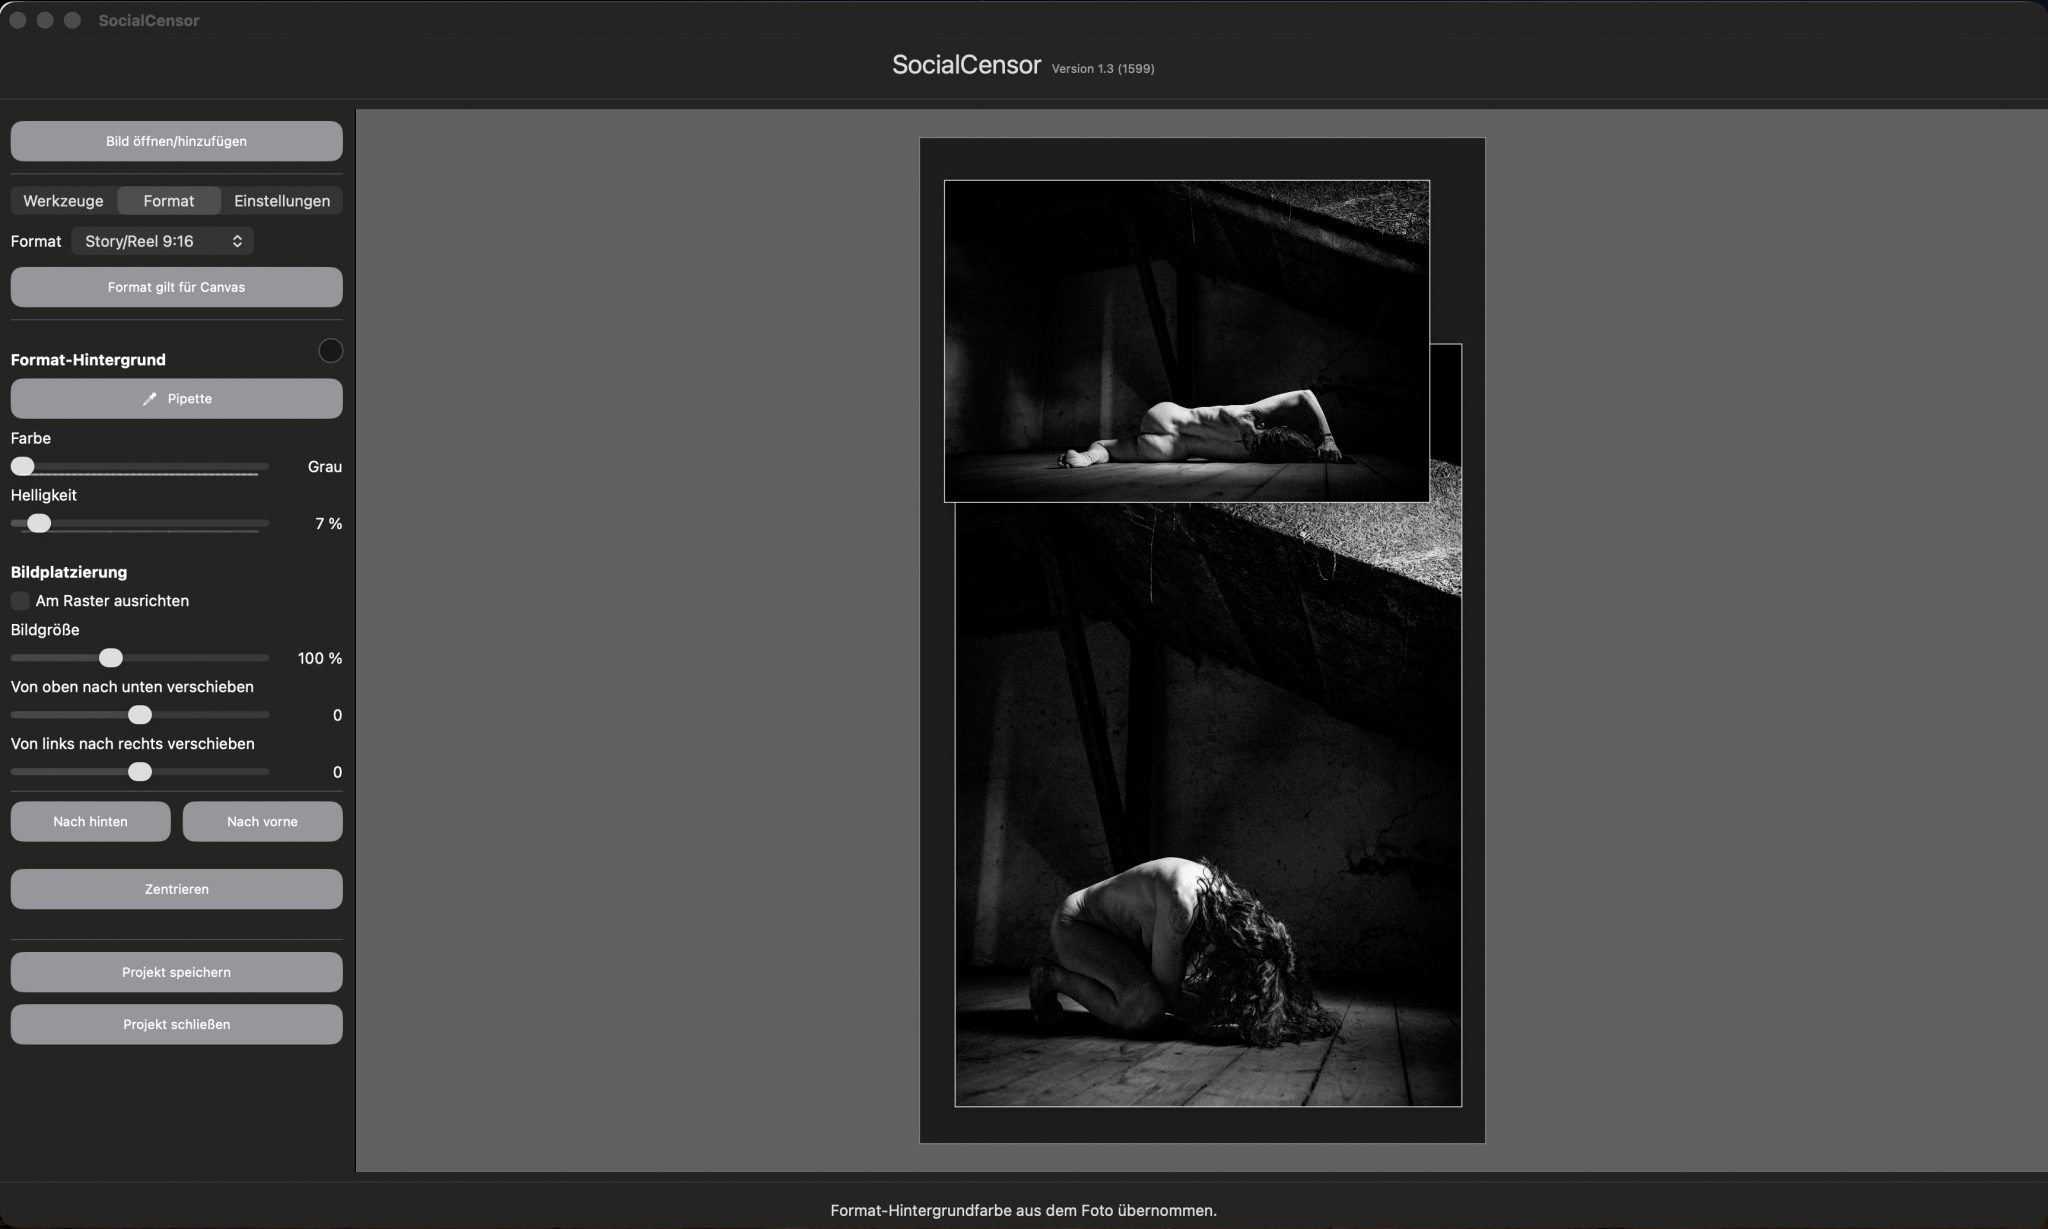
There is also the right format for the Instagram story. Here with a dark background.
1.91: 1 Landscape format
Landscape format
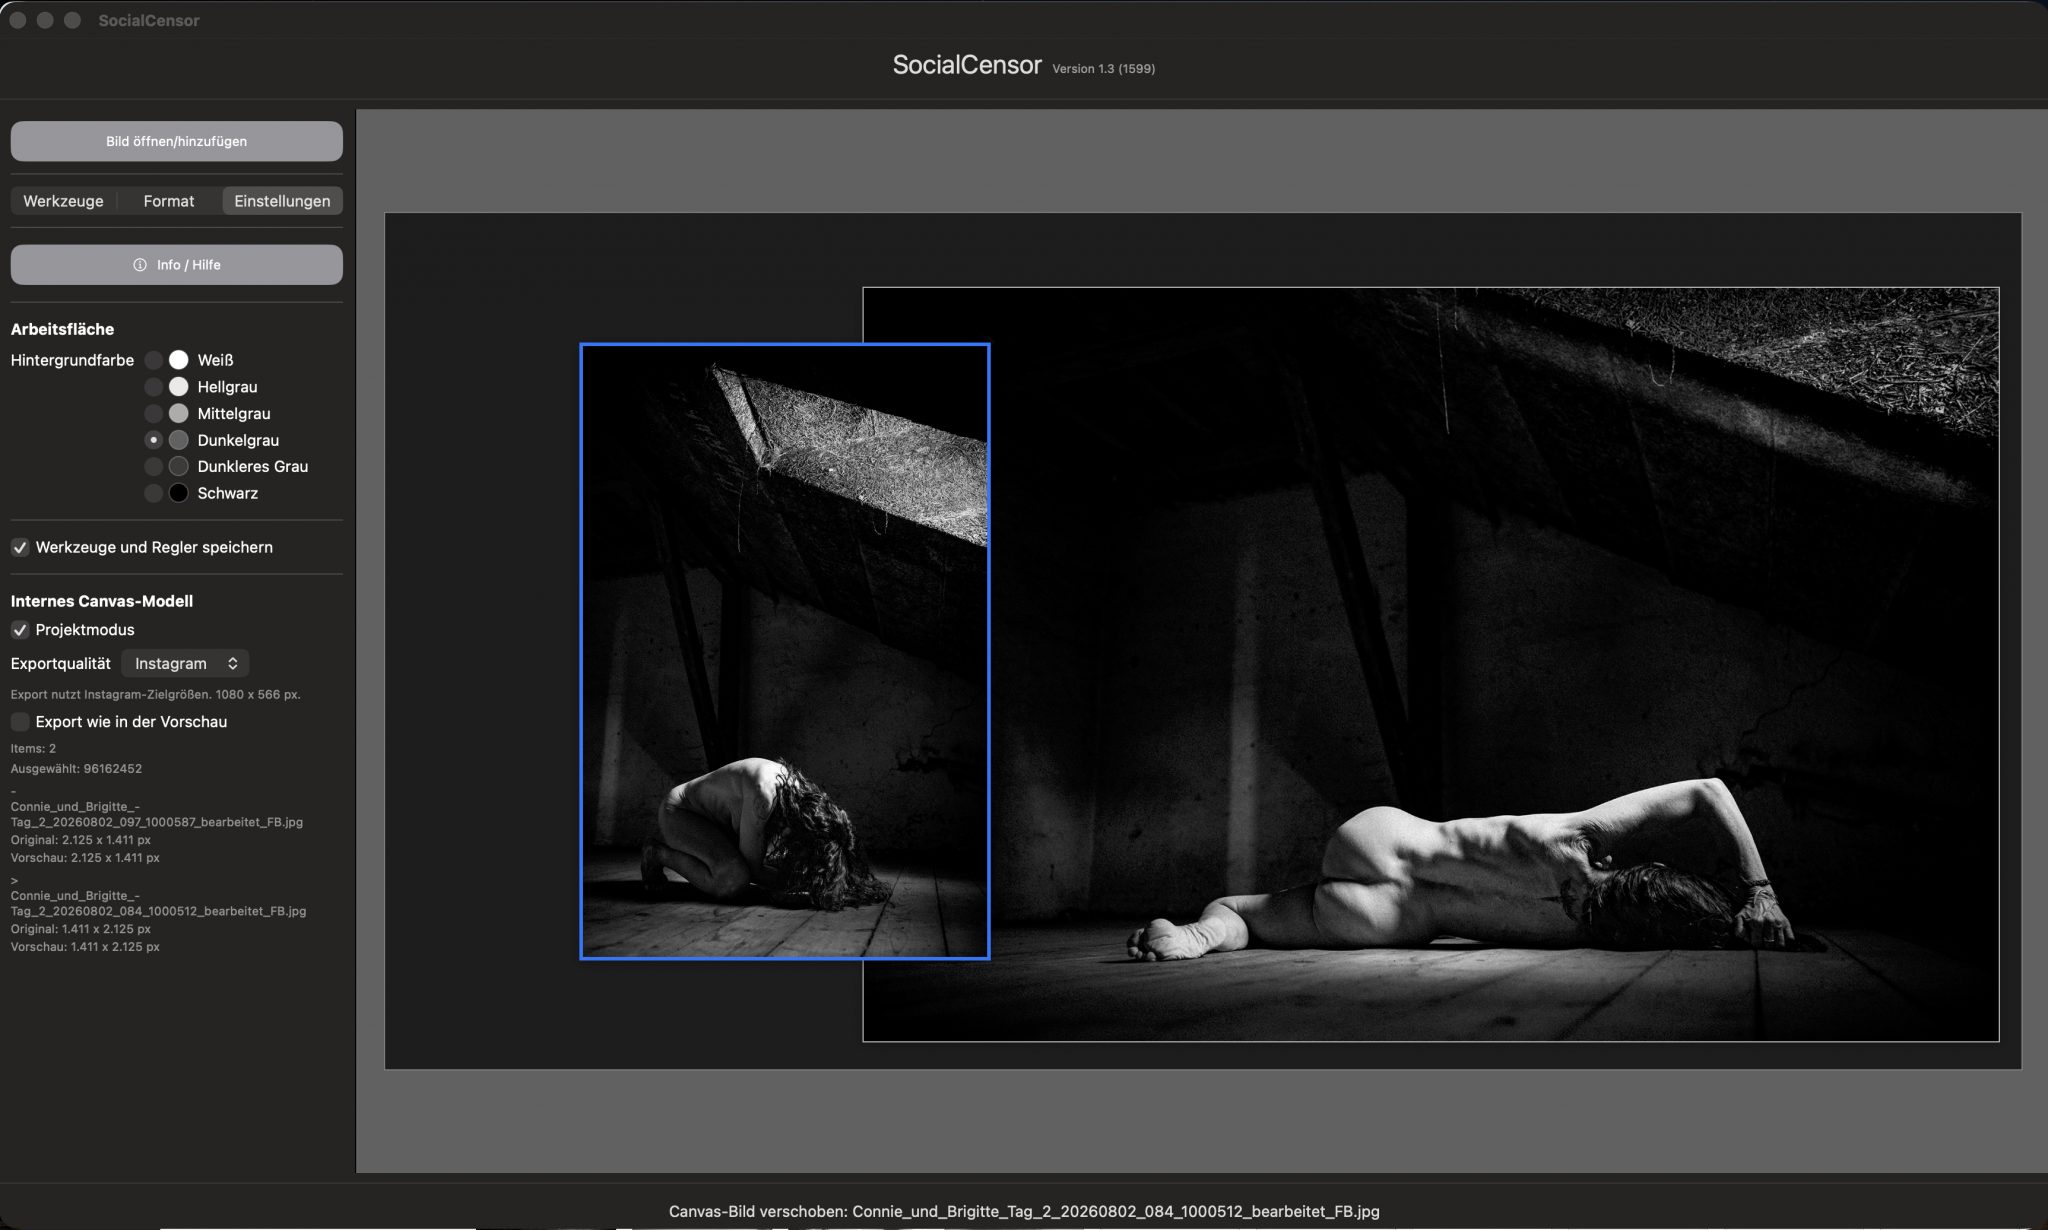
A particularly oblique instram format is 1.91:1. Who has come up with something like that …
PROJECT EXPORT
Export in three sizes
You can export the finished images in three sizes:
- Automatic with an edge length of 2,125 px
- Premium size customised to the resolution of your images
- Instagram format with correspondingly required resolution
THE NEXT IDEAS
Text Canvas
From version 1.4 I will provide a text tool. With a white/coloured background or with a transparent background.
Quick-Tip 1
If you want to edit a photo in SocialCensor on your iPhone or iPad (iOS version) and then post it on Instagram, for example, the fastest way is with these three steps.
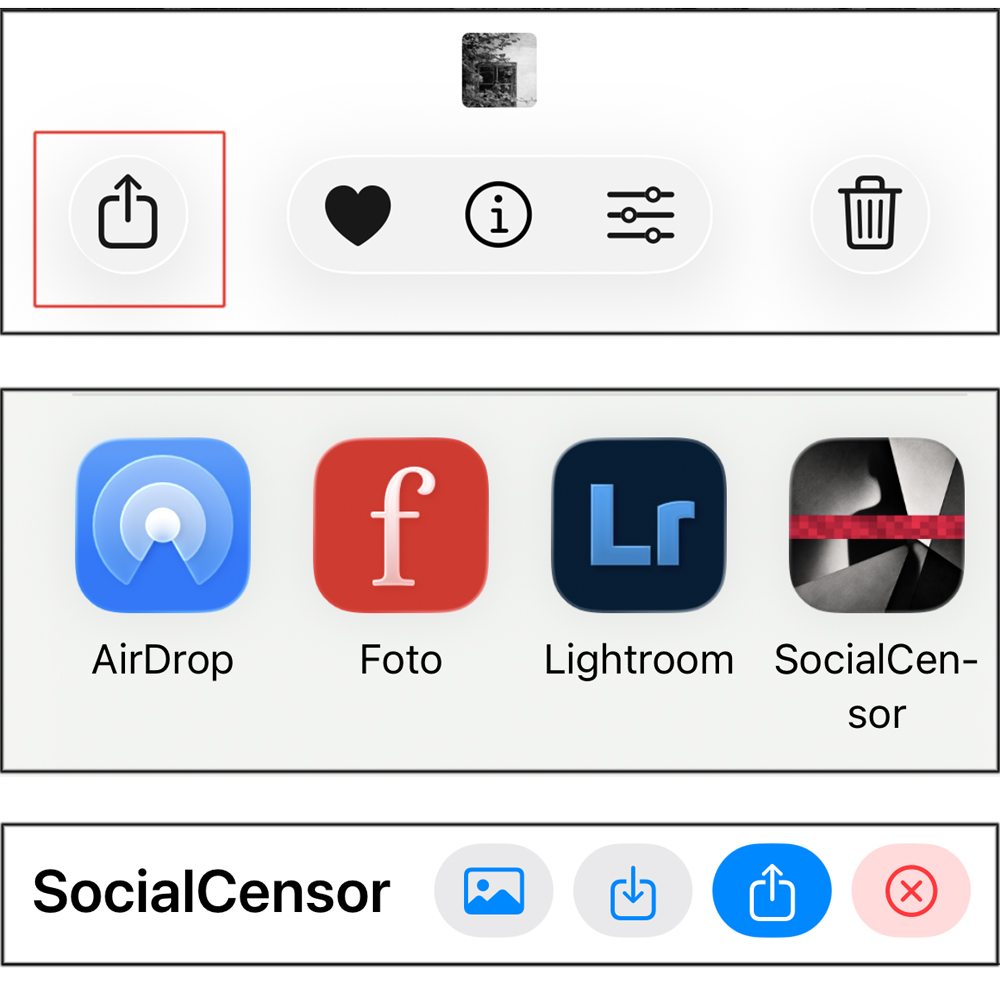
2. Select SocialCensor
3. After editing, select „Send to“ again

Send to
Select the image in your media library and send it to SocialCensor via „send to“.
If you can’t find SocialCensor among the favourites of „send to“, open a photo and tap the share icon. Choose More → Edit and add SocialCensor with + to your favourites. After that, you can reach SocialCensor directly via the Share menu.
Work on
The photo has now been automatically uploaded to SocialCensor.
Edit it here according to your wishes and then click on „Send to“ again at the top of the menu bar in the SocialCensor app.
Select the icon of your social network and send it to your feed via „send to“.
If you need further explanation, please write to me.
Of course, if you have ideas for future releases.